


This is a project I completed while I was an Intern at North House Folk School as well as a graduate student studying Experiential Education at Minnesota State University. I've since finished both programs, and I carry the lessons of this project with me always.
During my remaining months at North House, I'll be working on my slöjd project, the capstone of my internship that binds together traditional craft, community-building, and craft education. This slöjd project will also be submitted as the capstone project for my master's degree.
Slöjd in the broadest sense of the word is a philosophy about the entire process of creating works by hand, educating others to be crafted and self-sufficient while integrating a beauty and appreciation for the folk art and tradition of the culture.
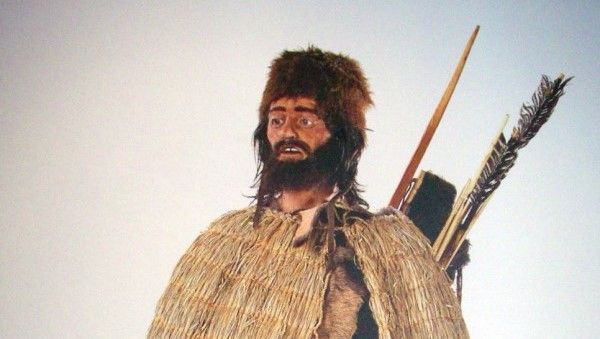
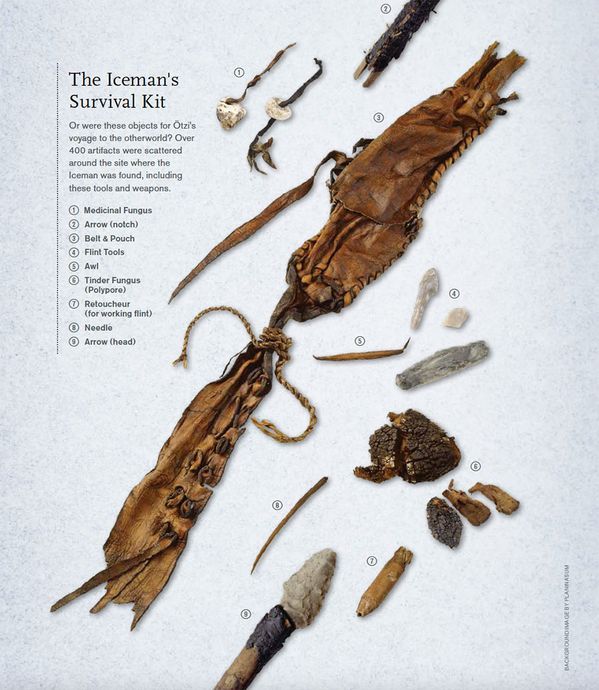
In 1991, two hikers in the Ötztal Alps came across the bald head of a frozen, mummified body in the Hauslabjoch glacier on the border of Austria and Italy. At first, the body was identified as a hiker who had gone missing in the previous months. After finding some leather objects nearby, the body was confirmed as a soldier from World War I. An axe, thought to be iron, was then discovered, confidently placing the body in the Middle Ages. After the body was fully exhumed, analyzed, and radiocarbon dated, it is now believed to be over 5,000 years old. The glacial mummy is now known as Ötzi, and he is a rare specimen.
My project will be to recreate Ötzi the Iceman's equipment and clothing. I will attempt to be as faithful to the original materials and processes as possible.
Currently there is a vast library of academic research on Ötzi - in fact, he is the most-studied human body in history. For all the genetic testing and radiological analysis, however, there has been very little effort put towards making Ötzi's crafting techniques and technologies available and accessible to the greater public. I think this is a complete shame, as Ötzi himself was part of the greater public, and by all accounts the skills he had were both necessary and common back in his time.
The achievements of the past provide the only means at command for understanding the present. Just as the individual has to draw in memory upon his own past to understand the conditions in which he individually finds himself, so the issues and problems of present social life are in such intimate and direct connection with the past that students cannot be prepared to understand either these problems or the best way of dealing with them without delving into their roots in the past... Present experience can expand into the future only as it is also enlarged to take on the past.
My intention is to learn from Ötzi's resourcefulness, ability to live wholly within his natural environment, and capacity for slöjd thinking. It seems to me that Ötzi had a very unique crafting style which focused on simple, well-made objects that were easy to repair and easy to discard.
On the slab lies the shrivelled corpse of a man, naked except for a strange, grass-filled shoe... I need only a few seconds. This is something any first-year archaeology student could identify... I straighten up and give my verdict: "Roughly four thousand years old... and if the dating is revised it will be even earlier." Henn and Unterdorfer look at me with total disbelief but quickly the tension vanishes and the fiercest discussion ever to be conducted in the Institute of Forensic Medicine erupts. This is only the beginning. What we would be faced with over the next few hours, days and nights remains indescribable. Though I will try to describe events as they unfolded, at best it will be only a pale imitation of what really happened. You just had to be there.
I'm drawing on lots of stories and histories for this project. Ötzi has a gravitational pull for me - the work feels overdue and the ideas I've been orbiting for a long time.
I've ordered The Man in the Ice on the recommendation of a video on remaking Ötzi's flint knife. It's a good book for getting the specific measurements and technical details of all his gear. This book will be invaluable as I go forward.
Documentaries Iceman Murder Mystery and Ötzi "The Ice Man" set a great foundation for understanding the scientific consensus on Ötzi. I am already noticing how little his craft techniques are mentioned in these sorts of programs, even though they are so rich with prehistoric skill.
When I was a wee grasshopper, my friends and I would ask our parents to get weird old machines from the thrift store or from the abandonment section of the attic, and we would take them apart. I still have some excellent magnets from an external CD drive I took apart when I was maybe eight years old. Even though I didn't understand much of the function of anything I found, it was so fascinating to me that everything could come apart and be used in a different way. It seemed to me that even the smallest pieces of machinery could be, in their own way, raw materials to be used for something else entirely.
This sort of free-scavenging seems common to craftspeople of all ages. I am already immensely grateful to all the YouTube enthusiasts who have published videos on flintknapping, weaving, rope-making, leatherwork, and all the rest for their devotion to sharing their knowledge and passion for the lessons of the past.
I am already thinking that Ötzi was a very different craftsman from the sorts of woodworkers, leatherworkers, and toolmakers we are today. Materials like grass and flint are readily available and quick to work - in just a few minutes a few stalks of grass can become a twined rope, a hunk of flint can become a deadly blade. Being made so quick, these objects are also easy to discard back into the environment from which they came. I think there is a style of craft to be honored here, a style that speaks to Ötzi's complete immersion in his local environment. If we could walk with him, I think he would show us that everything is a material.
The work begins.
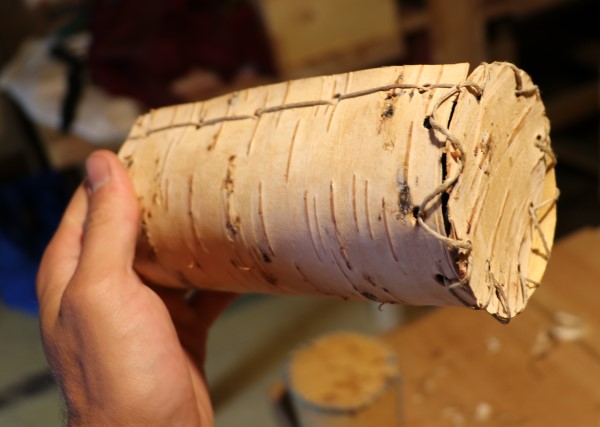
Ötzi was carrying two birch bark containers when he died, one of which had a burning ember and freshly picked maple leaves. From what I've heard, this is a practice widely held across the world. In South Africa, Khoi San drill a hole halfway through a huge elephant turd - basically a boulder of dried grass - and place an ember inside. The ember can burn for days and days until finally plopped into a fresh bundle of kindling.
The issue with Ötzi's containers is that all the important bits are rotted. From what I've read, the containers were entirely made from birch bark - sides and bottom - and stitched with basswood. Here at North House, birch bark containers are a big thing, but the bottoms are made from softwood. This keeps the shape of the container solid and, of course, wood is much tougher than birch bark. The wood bottom is usually stuck on with wooden pegs. So, looking at Ötzi's birch bark, I don't have much of an idea where to begin. The seams on the sides and the bottoms are rotted, so not even the stitching holes remain.
Not that I'm complaining, of course. It is breathtaking how much detail can still be seen on this container. How much wood bark do you wanna bet is still around from 5,000 years ago? But the fact remains: we just don't know how this container came together.

This picture was taken by Don Hitchcock of a traveling Ötzi the Iceman exhibit. It looks to me like a simple whip-stitch was used here, with maybe some pine or birch sap as a gluey substance around the stitch. A good start, but still, the original stitching is a mystery.
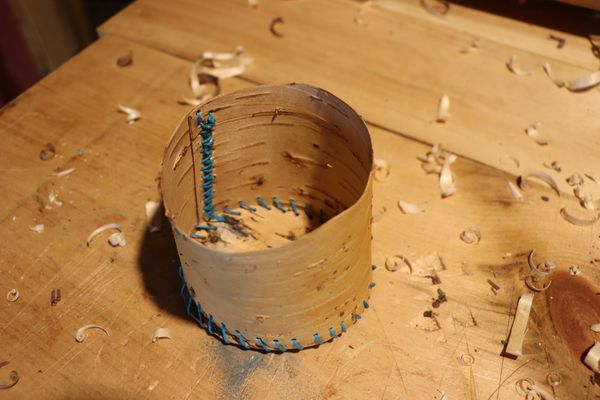
So, I've been experimenting. First things first, I learned that if you don't oil up your bark, the whole thing cracks to pieces and that's the end of that. I've been using a 50/50 mix of walnut oil and beeswax (thank you, thank you, Birch Bark Beth). We harvested loads of birch bark this summer, so I grabbed a leather punch, some twine, and got to work.
This one ended up very loose. As you can see, I only did a single running stitch along the side, so we've got this goofy flap. The bottom is also unstable - it is too big and I couldn't pull the string tight enough to be snug without cracking the bark. Also ugly. 0/10.
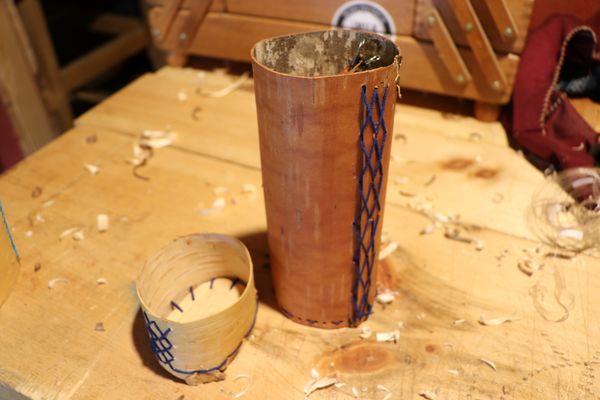
Though I like the sharp blue color on this one, the whip stitch along the bottom didn't feel quite right. Again, the bottom is too wide, and I wouldn't trust it to stay together if I threw it in a backpack like Ötzi did. I used a fatter piece of bark for the bottom, and a very thin piece for the sides, which makes this container weirdly squishy when held but solid when set down. 1/10 for good color.
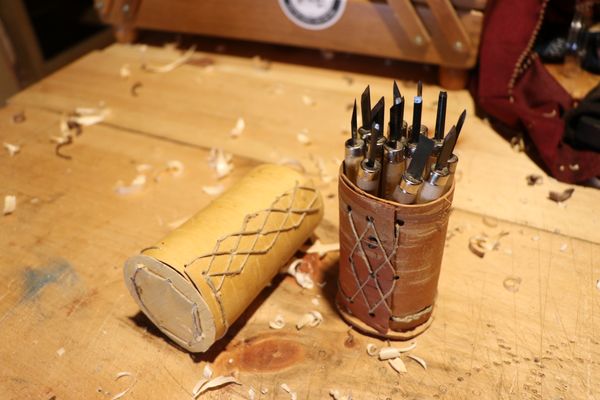
These ones I like much more - the x stitch on the sides keep the flappy ends closed and feel very strong. However, these bottoms are way too wide and would definitely catch and crack on anything nearby. Good for holding carving tools on the workbench. 4/10.
Again we see a gorgeous x stitch and - oh my - a nice thick bottom that fits snug inside the container. Wowee! Now we're cooking. An issue that is coming up is that using a leather punch to make these holes acts sort of like a wedge, pushing the bark apart and cracking along the edges. All in all... pretty cool. 5/10.
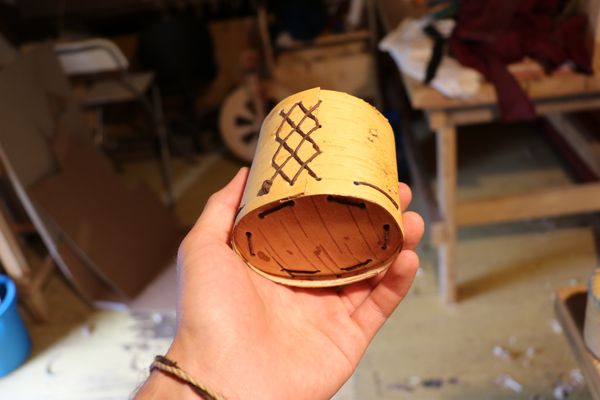
Oh mama. This one feels great. A strong bottom and smooth x stitch. Still, I wouldn't entirely trust this container bouncing around in a backpack - which raises the question, did Ötzi's canisters have lids? If he was carrying around a live ember, I think it's likely. Though perhaps a lid would snuff out the ember? Maybe some field testing is in order. 6/10. We're getting close.
I'm curious about using modern materials in the same way Ötzi used what was available to him. There are so many unique materials around us that we simply throw away - we are swimming in glass, plastic, metal, all kinds of raw material that would have been worth a fortune only a few generations ago! If only our ancestors could see what treasures we throw in the recycling bin.
I've seen a couple videos on making plastic cordage and such by cutting bottles into spirals. Unfortunately, most fall somewhere in between "hardcore apocalypse survival soldier" and "tOtAlLy weiRd cRaFts you can do at home with only a zillion clamps and six thousand dollars of woodworking machinery". Even so, it's wicked simple and dead cool. My thought is that thinly-sliced plastic bottles can be made into cordage, and thick slices are just the right size for basket-weaving.
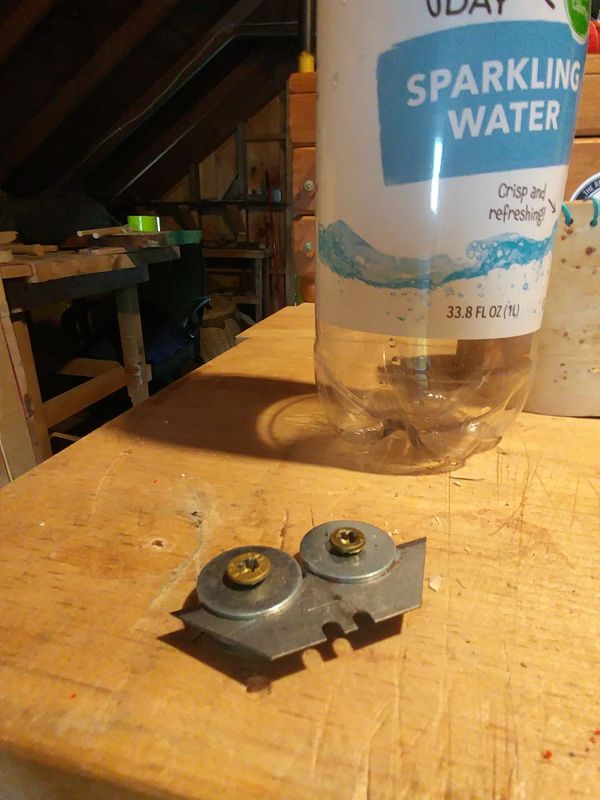
My first draft of this tool is just a razor blade clamped down onto a few washers. Works great but takes a long time to adjust, and is certainly not portable. I think it wouldn't be too hard to attach this sort of setup to a handle instead of to a table, in order to bring it out. Maybe out on the town, you know, and impress your friends by making cordage out of a beer can instead of smashing it on your forehead (equally impressive, but much less slöjdy).
For the future-half of my project, I want to focus on processing and crafting materials, not just simply using junk as it's found. One example would be a water flask: obviously a plastic pepsi bottle would carry water just fine in a post-apocalyptic world, but that doesn't reflect any kind of material knowledge or craft skill, which, you'll remember, is the whole point. For the purposes of this project I don't want to use anything as it comes. A plastic bag as a backpack? No, a backpack crocheted from the twisted strips of a plastic bag. A t-shirt as a bandanna? No, a bandanna woven from the stripped fibers of different t-shirts into a new and slöjdy pattern.
I've been talking to Tina Fung-Holder, an instructor here at North House and a junksmith extraordinaire. Growing up in British Guiana, she made toys and games and clothes and tools out of jungle plants and Imperial British junk. Living in Chicago, she transitioned to a fully junk diet, making baskets and jewelry of discarded objects and industrial materials. She's been a huge help in this project so far and I'll lean on her heavily during the process.
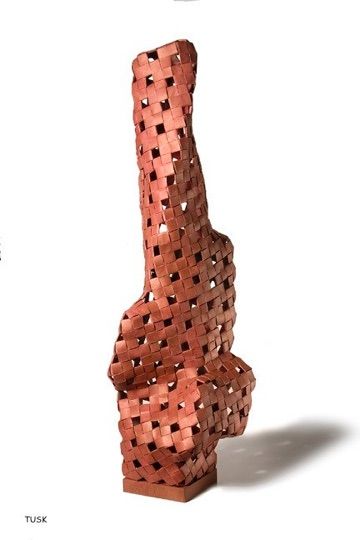
Above: Tina's sculpture "Tusk" made from paper towel roll tubes. Please note: everything is a material.
I've submitted an official proposal to North House for this project, and - guess what - it's been accepted.
Until November 21st, our official slöjd project presentation, I'll try and make as many of Ötzi's things as I can. The big deliverable of this project, aside from a lot of wood shavings, shreds of sinew, loose grass, and leather scraps, will be the story of what I found along the way. I am going to do my best to keep a log of what I try, what I learn, and what I make.
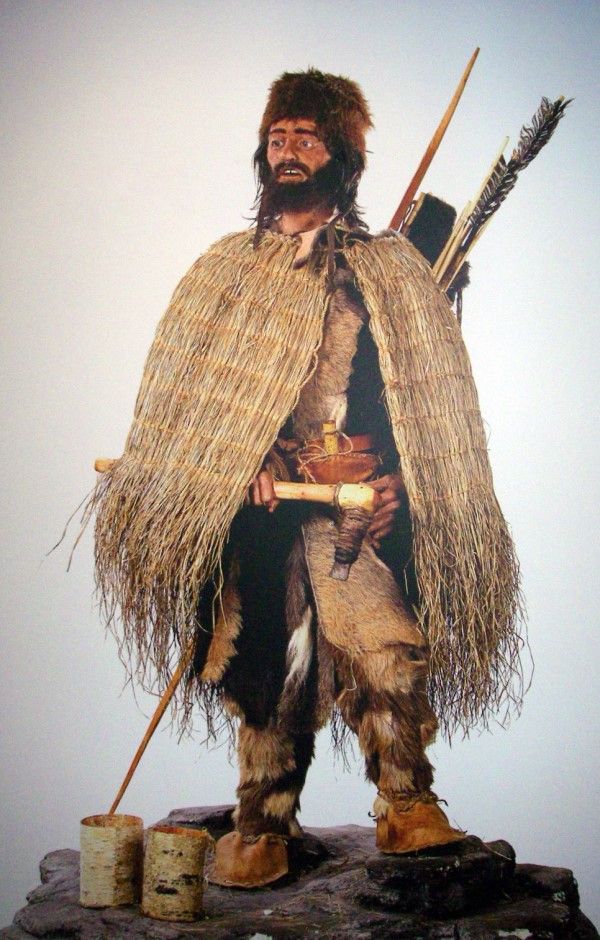
What a handsome fellow he is, eh? Someday soon I'll look just like him.
However, The story of Ötzi's recovery and study is not as anaesthetized and sanitized as the academic field may like us to think.
Not to alarm you, but apparently there's a curse that followed several of the original researchers, killing them in spookily Ötzi-related ways. I am considering how to walk the path of ancestral respect and compassionate evocation as I tread along with Ötzi. His story and his spirit are vibrantly awake in the world - his life and death are shared freely in the world, and I can't help but wonder how he feels about that openness. Surely it is an uncomfortable thing to be so exposed.
As I learn more about Ötzi, how can I make him proud instead of tempting the psychic dangers of graverobbers and tomb-breakers?
I've started reading The Man in the Ice, and since my budget is now approved I can go ahead and order some leather, flint, and a few extra woodworking tools. I did my best to source materials from responsible organizations, and I am keeping respect of the past in mind as I plan out my next steps. If I was really going in for it at the PhD level, I'd be making all his tools using flint blades, but there is only so much one can learn for the first time in a few months. Taking modern shortcuts will not, I hope, impede on the depth of knowledge I see in Ötzi's body and soul.
My proposal also includes a few field days for field testing. I want to try out the waterproofiness of the grass cape, the ember-carrying capacity of the birch bark canisters, the warmth of the shoes. Will I also field test Ötzi's goatskin loincloth?
Only time will tell.
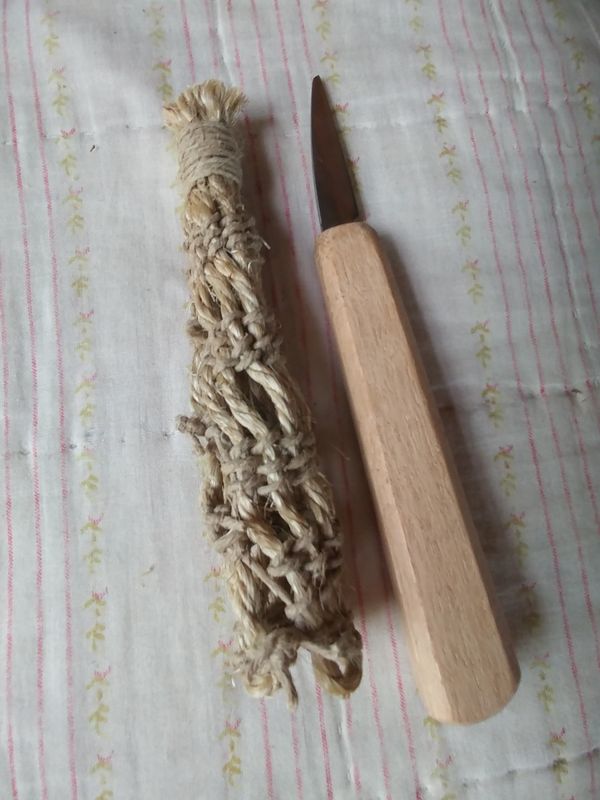
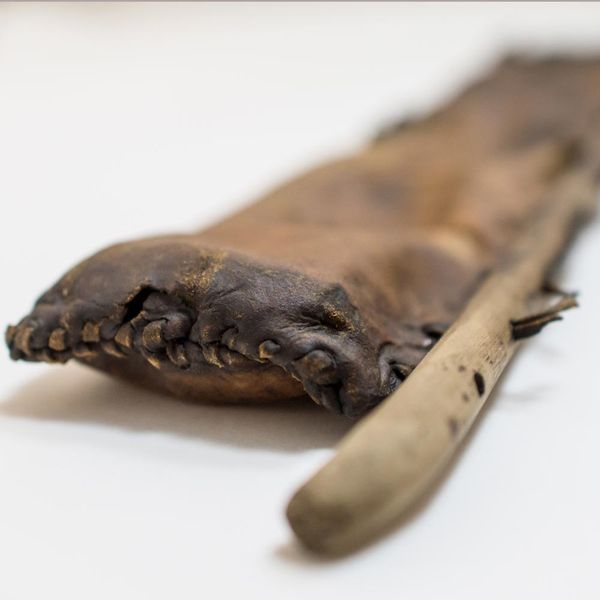
I attempted the knife sheath today. I didn't use quite the right materials, but I did learn about the technique.
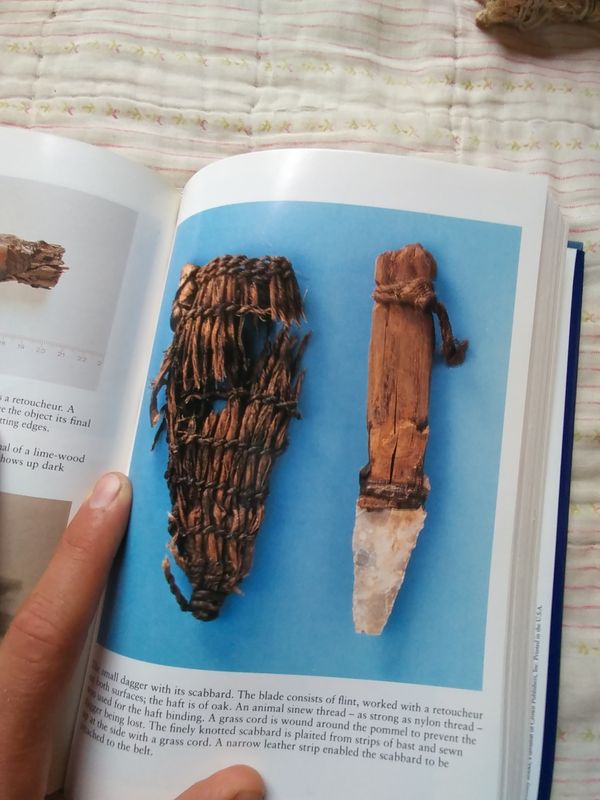
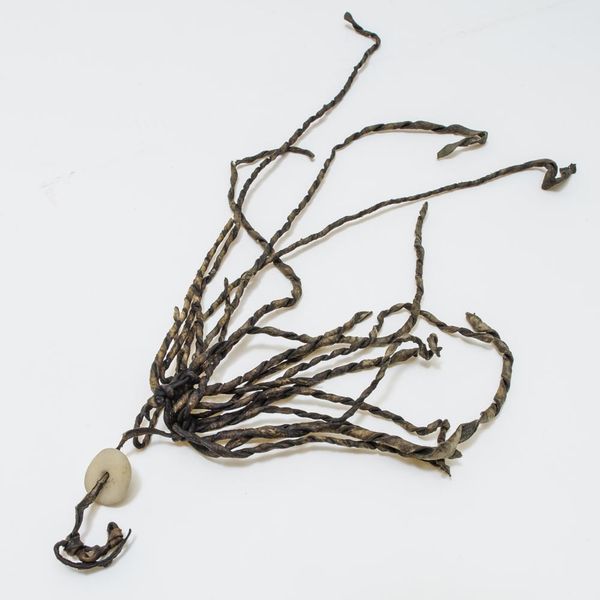
Ötzi's sheath was made of loose bast fibers, which are the fibers from a plant in between the bark and the wood. Bast is excellent for making cord, string, and rope, and indeed nearly all of Ötzi's kit is sewn together or knotted up with bast thread. Strangely, the sheath is actually made from flat and unspun flat fibers sewn together with bast cord. I wonder why? Twisting bast makes it much stronger.
In any case, what I had available was hemp cord and manila rope, so that's what I used. The technique is quite easy and I believe it is known as a pairing weave in basketry.
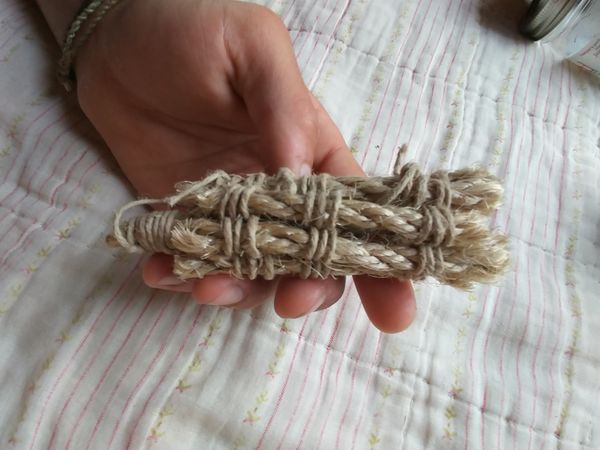
On this first try, I used short strands of rope which I awkwardly and messily cut on each end. The pairing weave was quite easy, and I noticed it was possible to adjust the tension on each band of weaving. Adjusting the tension of each strand allowed me to change the shape of the sheath as I went. I get the feeling you could make just about any sheath or basket form you wanted just by using this method.
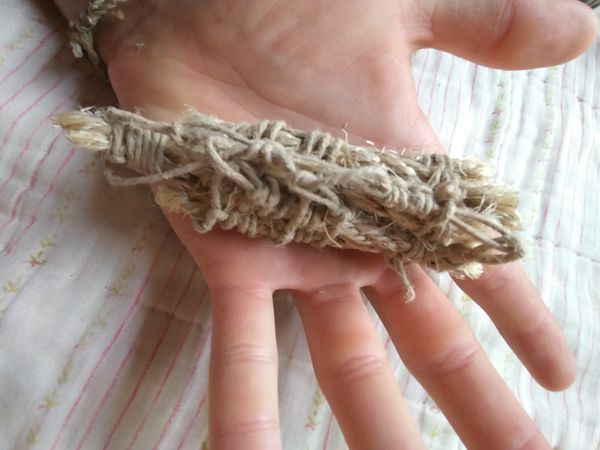
Ultimately, though, this piece finished with some very disorganized knots, and I couldn't really fit a knife in comfortably without catching on all the loose rope fibers and hemp tbreads. To taper the bottom, I just cut off some of the rope sections, which also made a mess and does not look good. Overall score 2/10, but a good start. I can see this as a contender for "Most Improved" award in the future.
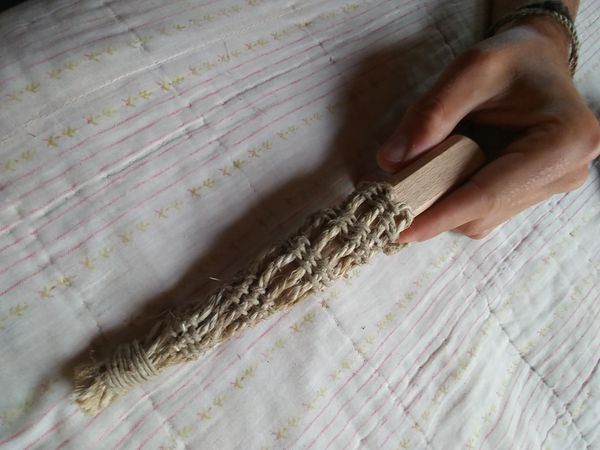
Second try: much better! On this one, I did a few things differently. First, I wove the sheath as a flat sheet as opposed to weaving it in-the-round, and then at the end I sewed up the edges. I also un-plied the three-ply rope and used one ply for each vertical cord - much sleeker and more manageable. This also gave the sheath a sort of wiggly shape, since the single-ply stayed curly after being un-plied.
Also, you can see I bent the ropes in half instead of just chopping them off, so the opening is much smoother. Most of these edits I made after watching an excellent video from Shawn Woods. I like to just wing it on the first try, to see how far I can get on my own lobes before I see how the pros do it.
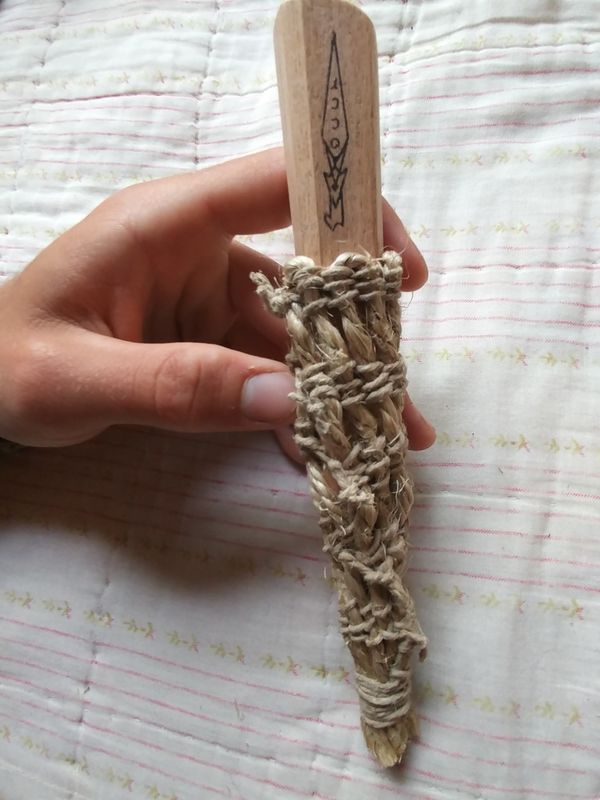
You can see the edge where I sewed it up has some loose strands and bulky knots. I want to work on loose strand management with my knotwork in general, because I seem to always end up with floating strands that make the whole thing look like a crappy arts and crafts display instead of something usable. Maybe I could sew the loose strands in between the thicker rope fibers, like tucking in the loose ends after finishing a knitting project? Even though Ötzi's work is half-rotted, his knotwork seems to be very clean, and his pieces have very few loose ends. I admire that sort of minimalism and efficiency when it comes to a craft that can be so tangled.
I'd call it at 4/10. Still some messy ropework and the blade gets caught if you sheath it too fast. I now understand why Ötzi used flat bast instead of woven rope: even a little bit of bulk gets in the way, and a thin sheath would allow smooth movement of the knife. The fit is very snug and the whole thing took me less than half an hour. I really like the look and I think I'll make some more for my other tools. Maybe a rope sheath for a hot coffee cup? Perhaps this method is how Ötzi made his grass cape too.
I'm having so much fun with this knife sheath thing... I just couldn't help myself from trying it with some different materials.
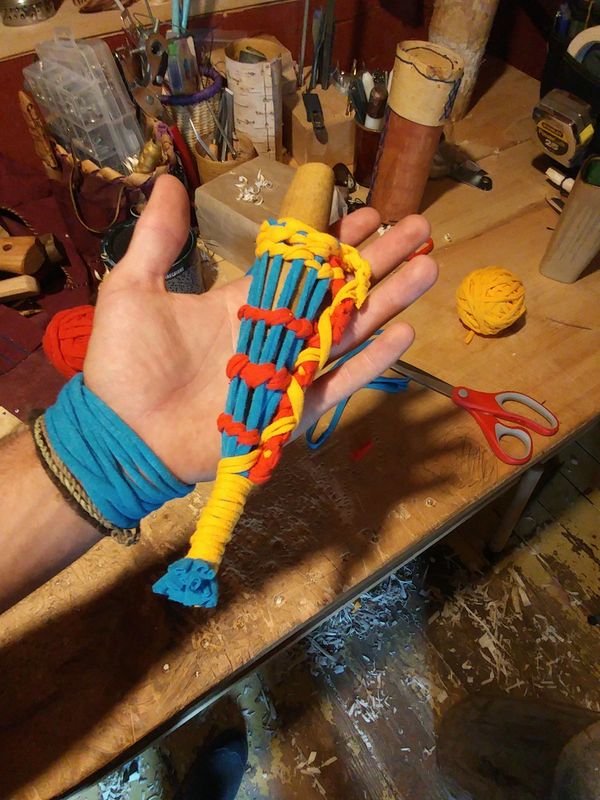
Ötzi's work is so magnetic to me because his techniques are applicable to all kinds of materials both ancient and modern.
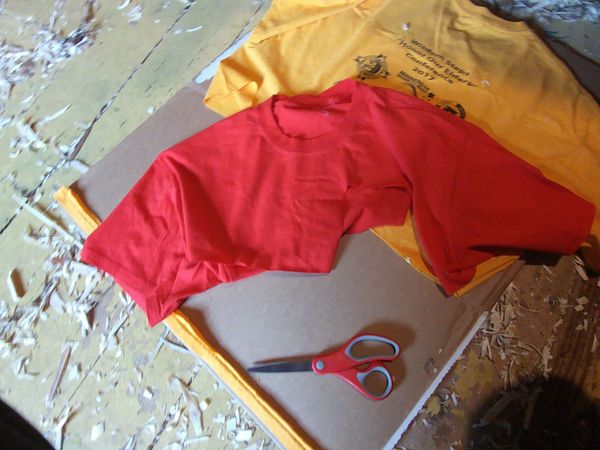
This is the same style as the other sheaths I've been experimenting with, but made from yarn cut out from t-shirts. The other day I procured three large and goofy shirts from the local thrift store ("Bayou Boogaloo 2008: Grand Portage, Minnesota!") and I wanted to test out the shirt-to-yarn pipeline. I'm not sure where I heard of this first but there are zillions of resources online about how to make the most efficient use of a shirt when cutting it up. It's a very Pinterest-ish sort of way to spend your time, and a very good way to get in the habit of seeing everything around you as a potential craft material.
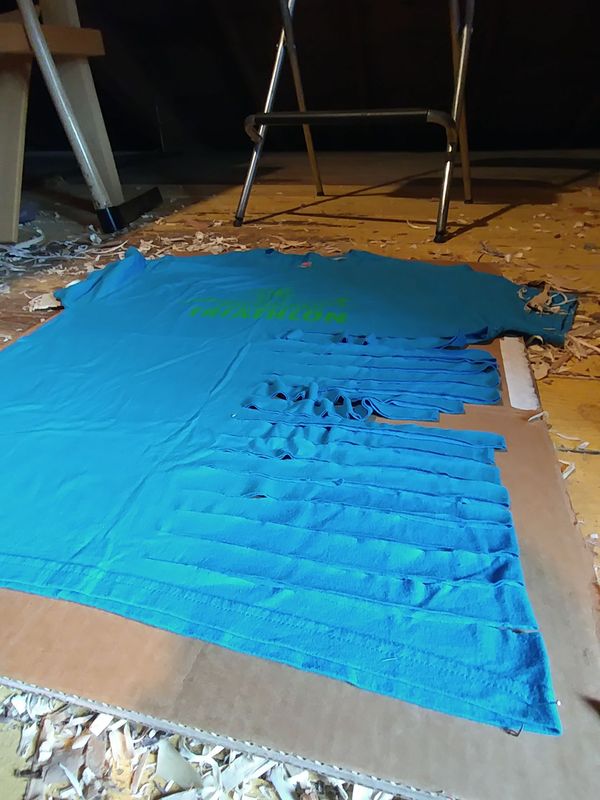
I started by pinning down a shirt to a large piece of cardboard. Some folks might measure their cuts but I just eyeballed it. The cool thing about this method is that you can cut the whole shirt - or most of it, at least - into one continuous strand.
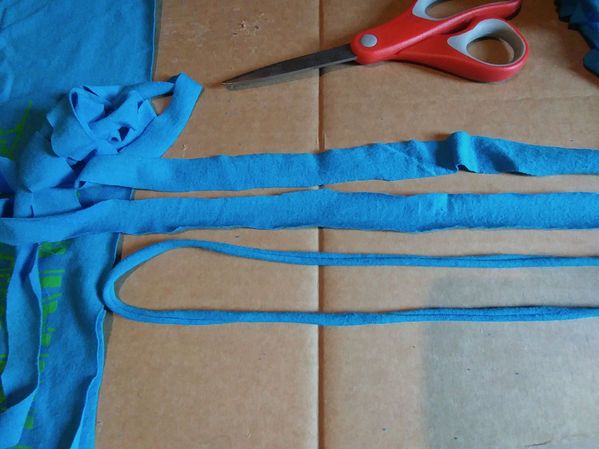
To start, I made a row of cuts on either side.
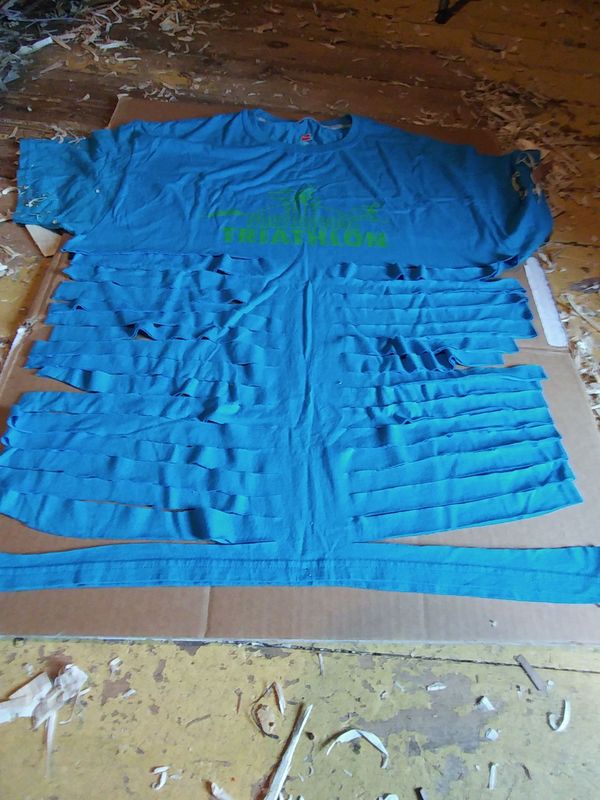
Then, the tricky bit. On the front side of the shirt you simply connect the cuts in a straight line. On the backside, however, you connect the cuts at an angle.
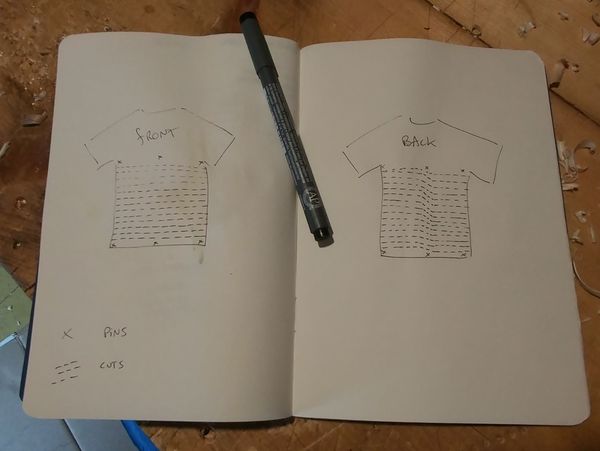
This makes the cut spiral around the shirt, turning the whole midsection into a single ball of yarn and leaving behind a unique and trend-setting crop-top.
Yes, I modeled this, and no, you don't get to see the picture.
Don't worry about the yarn having raggedy edges - the most fun part of this whole process is that if you give these strips a tug, a magical cinnamon-curl appears and the strip becomes a beautiful tubular strand of soft yarn.
Next I'll try and use the sleeves and chest portion, but it won't be nearly as satisfying. The thick seams are sort of a nuisance and tend to unravel messily but may be useful for something else.
A side bonus of this project is that, after cutting out the logos and prints from the t-shirts, I now have some very church-basement-style patches ("Minnesota Center for Aging 2017 Conference Attendee!") to sew on other projects.
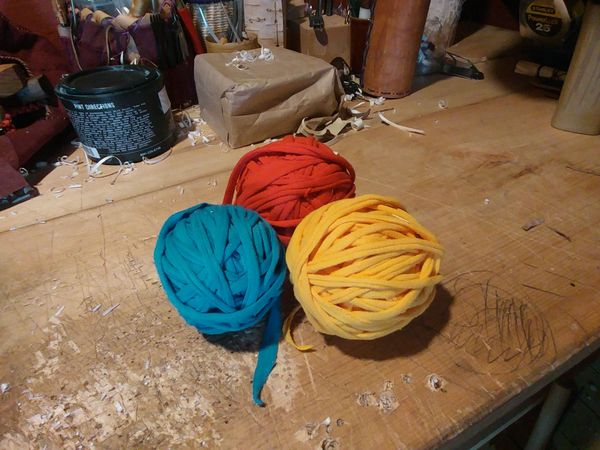
10/10. Great colors. Beautiful.
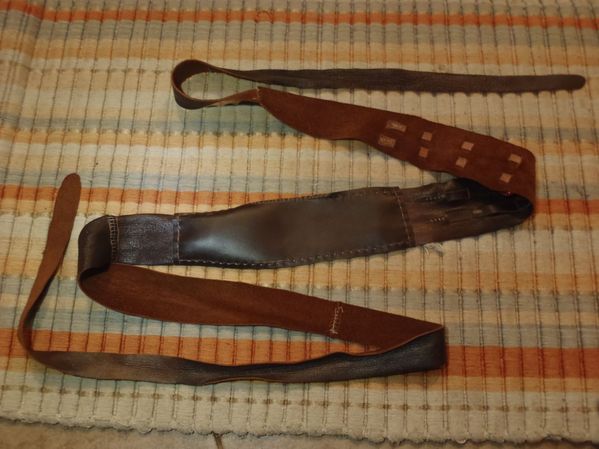
At last, the belt. Ötzi has been in the back of my mind for years, and that is mostly due to the crafty allure of his fanny pack.
The remains might not look like much, but the reconstructed piece is a full-on utility belt that would put Batman to shame.
I tried to take the measurements from The Man in the Ice book, which is technically detailed but the language is hard to follow and there are few pictures to support the descriptions. So I took a look at a reconstruction video or two.

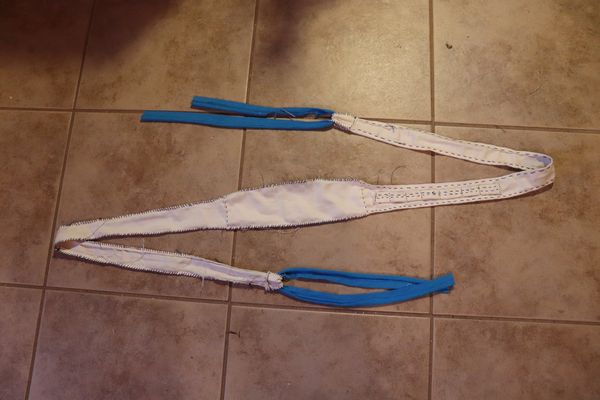
I don't yet have access to the amount of leather for the full belt, and I also wouldn't want to dive right in without understanding the shape. So I took some spare cloth and made a prototype. The Man in the Ice and this wickedly helpful diagram show that the belt was about 73 inches long with a pouch about 8 inches long, with an opening a little more than 3 inches long. On one side of the pouch is a set of loops for holding dongles - more on that later. The belt itself is simply a long strip tapered on both ends.
You can see there are lots of little fringey strings along the stitching - that's because I used this opportunity to experiment with different sewing stitches. The final leather belt will, of course, have none of this foolery, which means that any criticisms of sloppiness are officially outside the scope of this project and will be ignored.
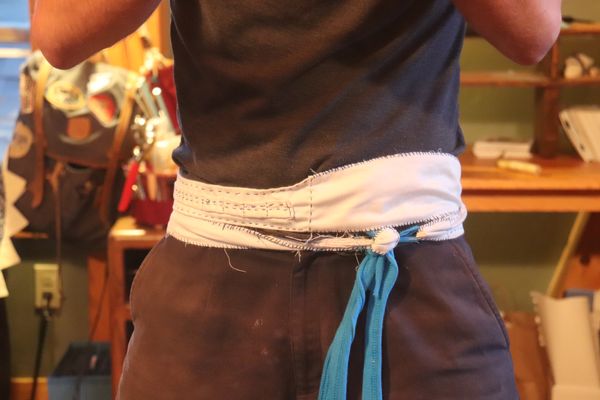
The belt is slim and fits nicely - though I did have to add a bit of length so I could tie the ends easily.

You'll recognize these dangley bits from our previous experimentation with t-shirt yarn.
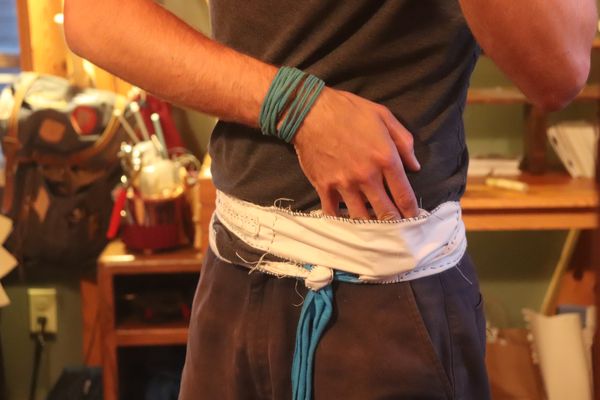
The pocket is easy to access and wide enough to rummage around in. It is simply a rectangular piece of fabric sewn onto the main belt. Unlike a deep pants pocket, this one is wide and shallow. I think it fits better on the body than the bulgy, bulky depths of man-pockets. Women-pockets don't count - they are shallow illusions and a cruelty to all femme-pants-wearing peoples.
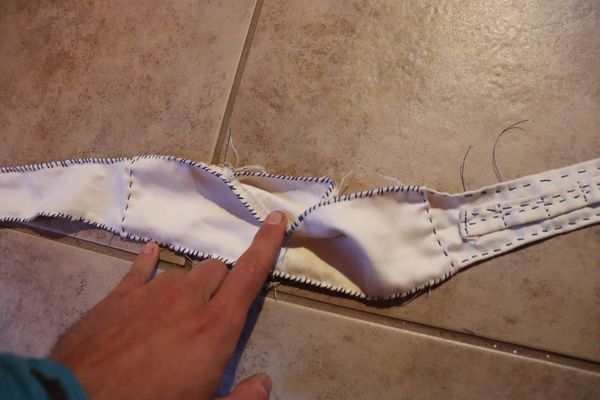
The documentation on Ötzi's pocket is sort of vague - the book mentions "decorative stitching" which may have been used to close the opening. Reconstructors seem to favor a small flap for security. I left this one open, just to see what happened.
What happened was my stuff kept falling out. However, I think with a little editing this might be my new favorite carryall solution. I mean, just look at how good this looks:
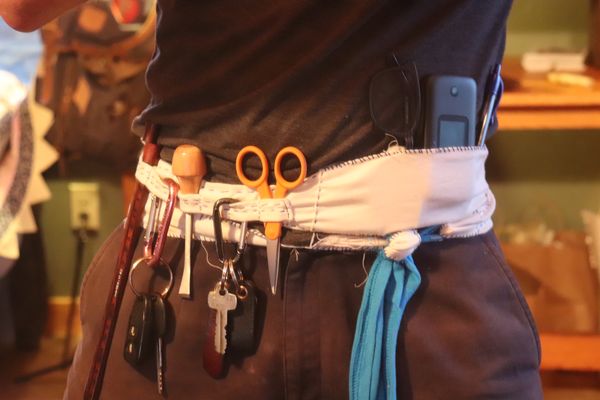
The dongle-holder bit is quite fun. On Ötzi's belt it is made up of two leather laces that run in parallel, very much like the MOLLE system used by gunslingers nowadays. Is MOLLE just an excuse for self-identified manly-men to accessorize without feeling girly? Yes. Anyways, on my prototype I only included one line of dongle-holders. I can already tell it's a slick way to carry anything - keyrings clip on nicely and COVID masks loop in and out easily.
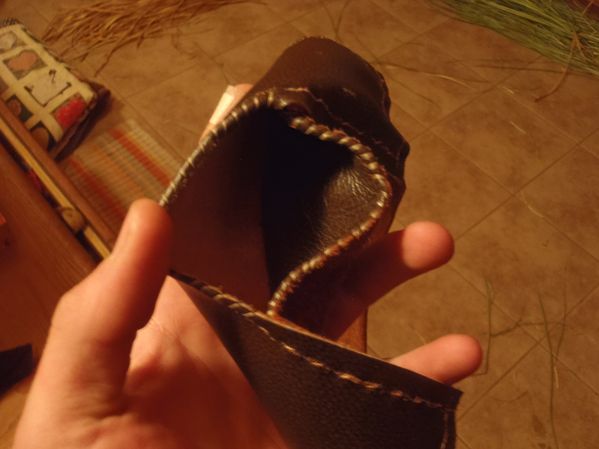
The leather belt was dead simple. Using the prototype as a model, I cut the same size pieces and stitched it on with some artificial sinew. You can see here I used a whip stitch around the pocket, which added some strength but also textured the opening so it was easy to find with my hand without fumbling awkwardly around under my shirt.
Like Ötzi's design, I added two strips for various dongles. I believe if Ötzi had caribeaners in his time, he would have made liberal use of them here on his belt.
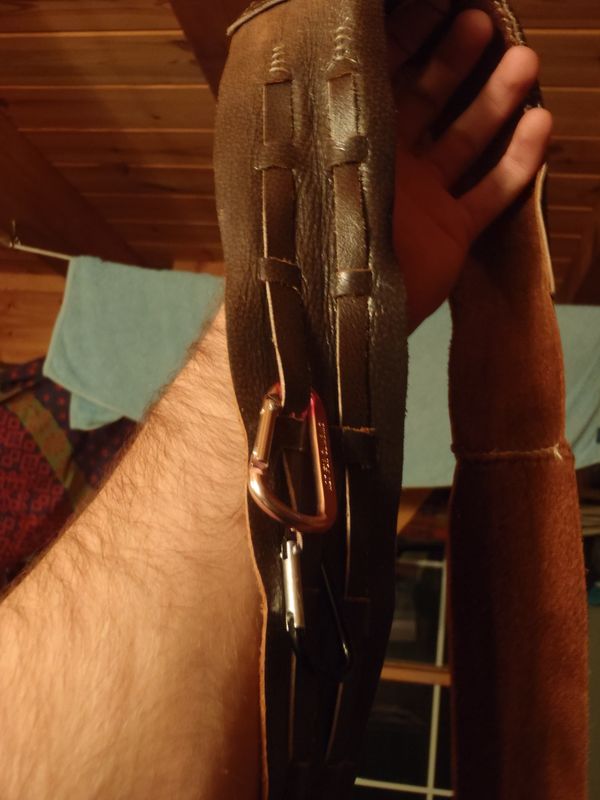
Yes, I wear this often. It is fantastically comfortable and holds an immense amount of weight without feeling awkward.
I've learned from The Man in the Ice that people in Ötzi's region still make and wear these today. They call them bananas.
I'm reading more and more about Ötzi and I'm just amazed how much we got wrong. All the first guesses were way off the mark - first he is presumed as a hiker who lost his way in the 1930s, then he is said to be a medieval mercenary wearing shackles, then he is said to be heavily burned, or to have taken a fatal wound to the back of the head... at one point an expert guesses that Ötzi is an "escaped convict" who made his stone knife while on the run! His guess was based on the perfectly straight stitching on the leather, which, according to him, could only have been done with a sewing machine.
There is so much we do not understand. Until recently, Ötzi's bird belt was a total mystery. Researchers guessed it had "ritual or spiritual significance," which is just academic-speak for "beats the hell outta me." Turns out it's for holding onto dead birds during a hunting trip.
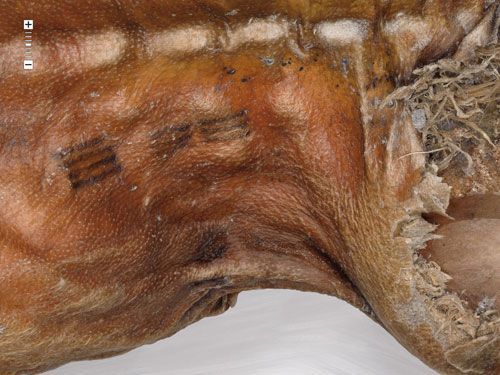
Ötzi's tattoos are a total mystery. To me these look like acupuncture points or some kind of body-medicine mapping, which would undoubtedly be labeled as "ritual or spiritual" but is, as we all know, just as real of a technology as toasters and wifi.

As I read further, the mystery just grows. Since Ötzi was found in a severe mountain pass, only experienced mountaineers can assess the archeology of the site. This is no Roman burial site turned up by a suburban British shovel. Only those practiced with ski pole and ice pick will ever see the pass where Ötzi fell. What kind of secrets are still sleeping in the glacier?
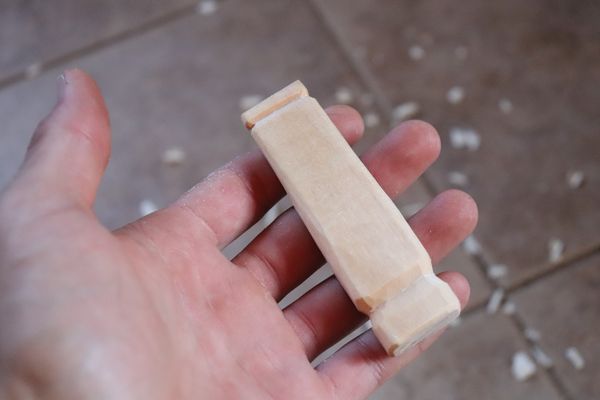
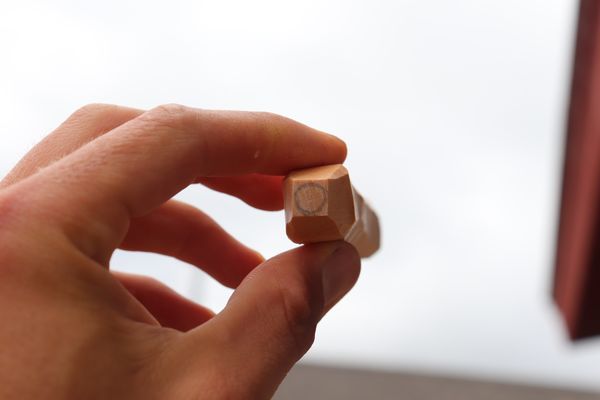
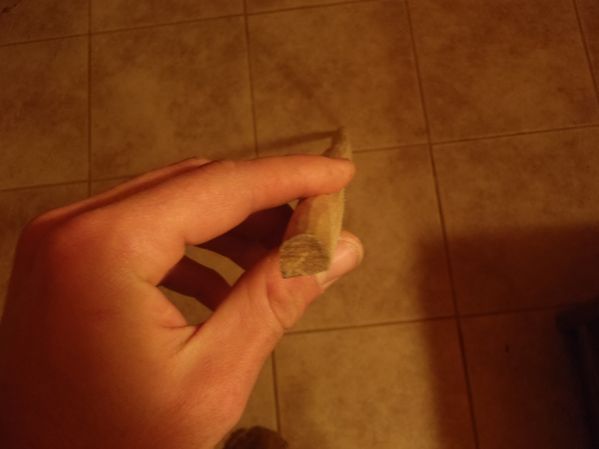
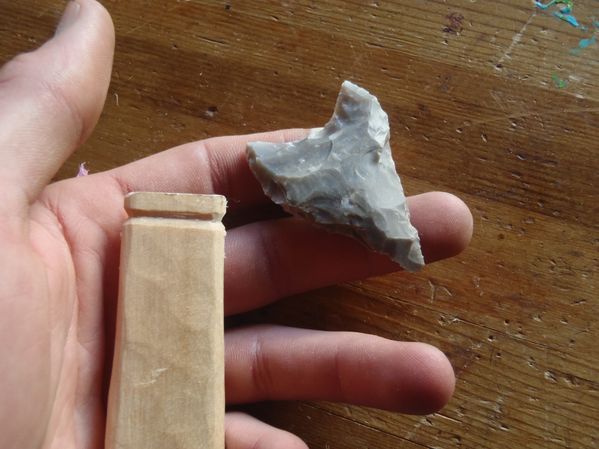
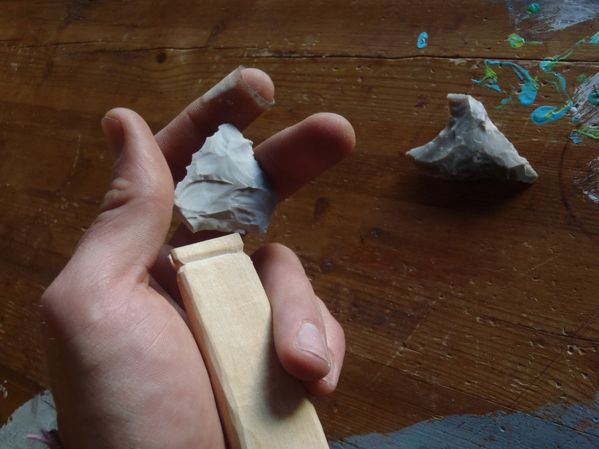
Using the measurements from The Man in the Ice, I cut some small pieces of birch to shape into the handles for the flint knife and the antler-tip flint retoucher tool. Time to bust out the slöjd knife and get crafty.

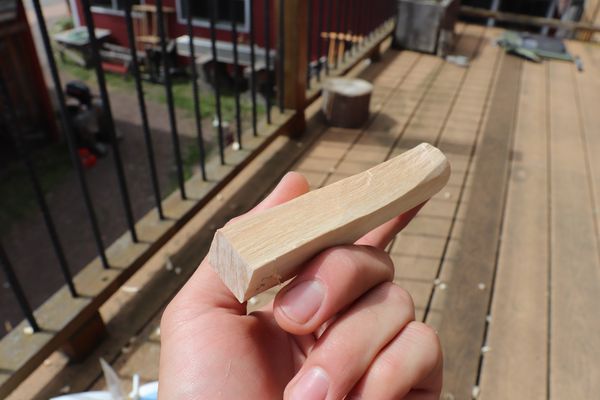
The knife handle has two indentations, one for an attachment dongle and one for wrapping the blade tight.
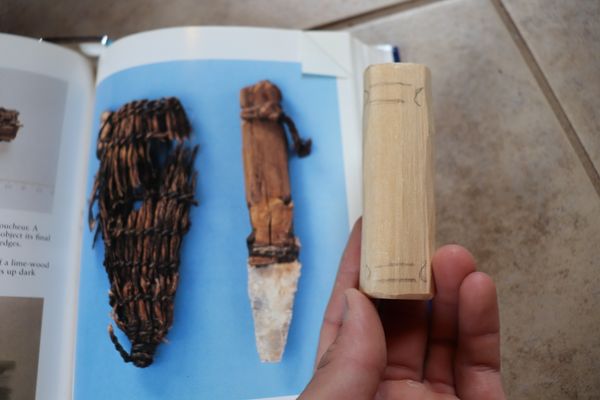
The book describes the knife handle as a "rounded rectangle", which was an easy shape to get. In hindsight it may have been easier to leave the branch whole while carving - it's tricky to get a good grip on a piece of wood so small.
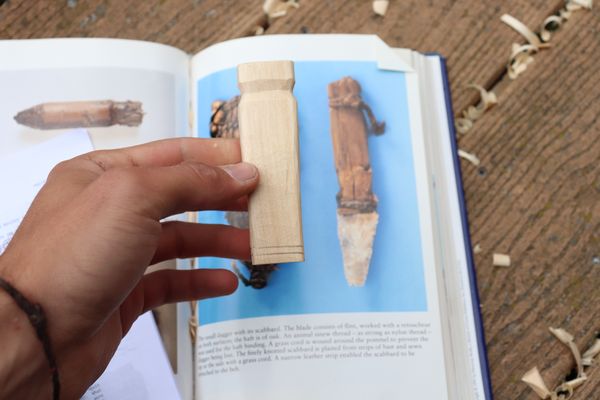
Quick and easy! The handle is only just big enough to fit in my hand, but after looking at some videos on how to properly use a flint tool, the smallness of the handle makes sense. Flint doesn't cut like a steel knife because the blade is much wider and the teeth are much bigger, so it is used more like a bread knife, a rasp, or a saw. The tool is held not like a modern knife but with the butt of the handle in the palm of the hand. Using it this way, the size is just right.
I don't yet have a knife blade for it - tricky business, flintknapping, and I've only taken one class a few years ago here at North House. (Secret: at the time of writing, I'm in the promo photos for this class! Look for the guy with the bald spot who, against all common sense, is wearing sandals while spraying blade edges all over the floor).
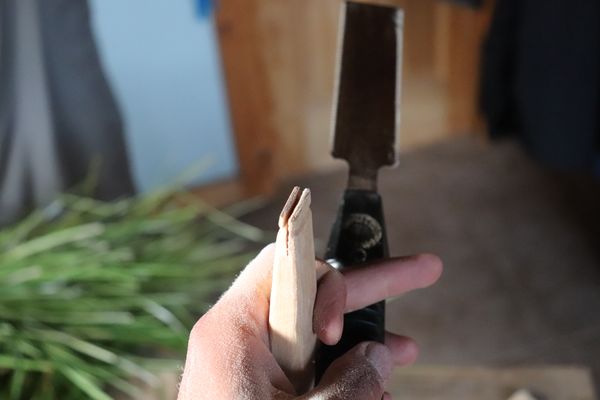
I sawed a small opening for the blade. I believe Ötzi attached the blade with some sinew, which I don't think I'll have access to, but I can try to do an acceptable job with the artificial stuff and some natural fibers.
Above: first tries at flintknapping after a long hiatus. Results are amateurish but promising.
The shape of the retoucher is a bit more complex, but is still a dead-simple carving project. The retoucher is more of a pencil shape, rounded into a circle and tapered at the point.
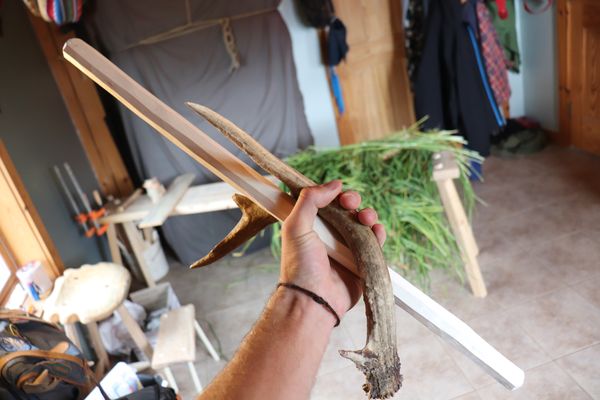
After a short meeting with Mike Schelmeske - known by former interns as the Slöjd Fairy - I asked him if he had access to an antler tip I could use for my project. As is his way, he showed up the next day with a box of reindeer, whitetail, and moose antlers. Ancestors bless this man.

I chose a small whitetail deer antler tip to cut and sand down to the rounded shape needed for the retoucher. This turned out to be a mistake - I should have chosen a fatter tip, maybe from the moose. You'll see why.
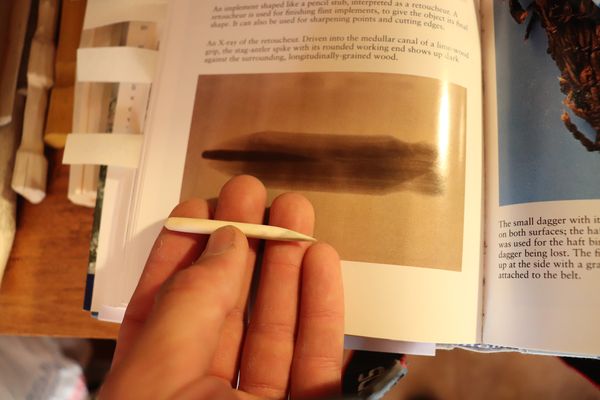
The tip is rounded but the other end has a long taper in order to fit tight into the handle. Holding it up to the image, it matched almost exactly. Nice. I used a bandsaw to cut the tip and a circular sander to take it down to the right shape. The hot antler dust from the sander smelled like burning hair. Not nice.
I also cut and sanded a longer antler tip for a secret bonus project, based on the tools I saw in the video I linked above about using a flint blade to cut a handle. This tip was pointier and ended up a much better tool.
Like I said, the handle ended up being fairly simple, but an excellent excuse to use my slöjdy green woodworking skills of rounding a rectangle, also known as squaring the circle, a lovely small exercise in alchemical geometry.
The idea is to get the right dimensions while keeping the piece as a rectangular prism, then cutting down the 90 degree edges into an octagon, then cutting down those edges, until you end up with an evenly-circularized shape. If, instead, you simply start rounding out edges at random, a nice even circle will never appear.
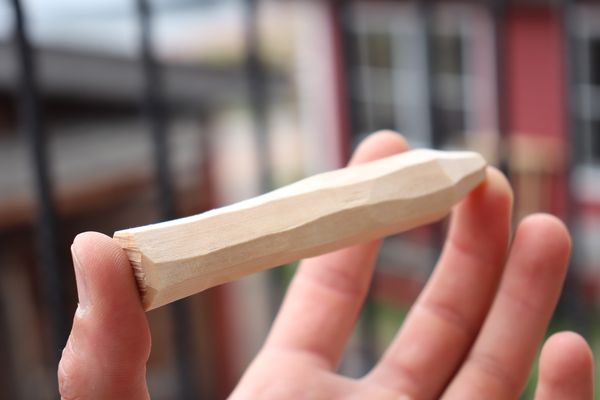
What a lovely octagonal prism!
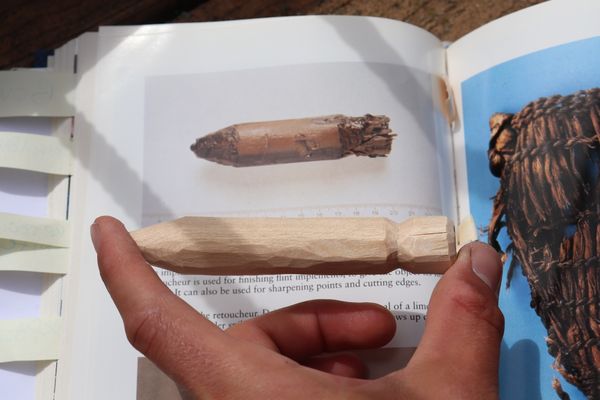
Rounded and notched, it looks quite nice. Like the knife handle, the notch will hold a small rope to attach the tool to the belt.
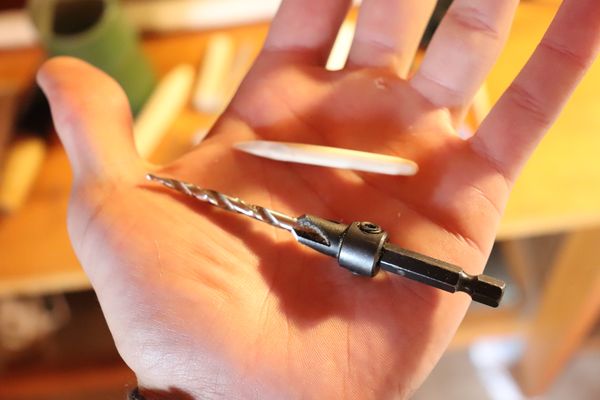
I chose to use a tapered drill bit to better match the antler shape - we won't be using any birch tar or other glue, so it's gotta fit in tight.
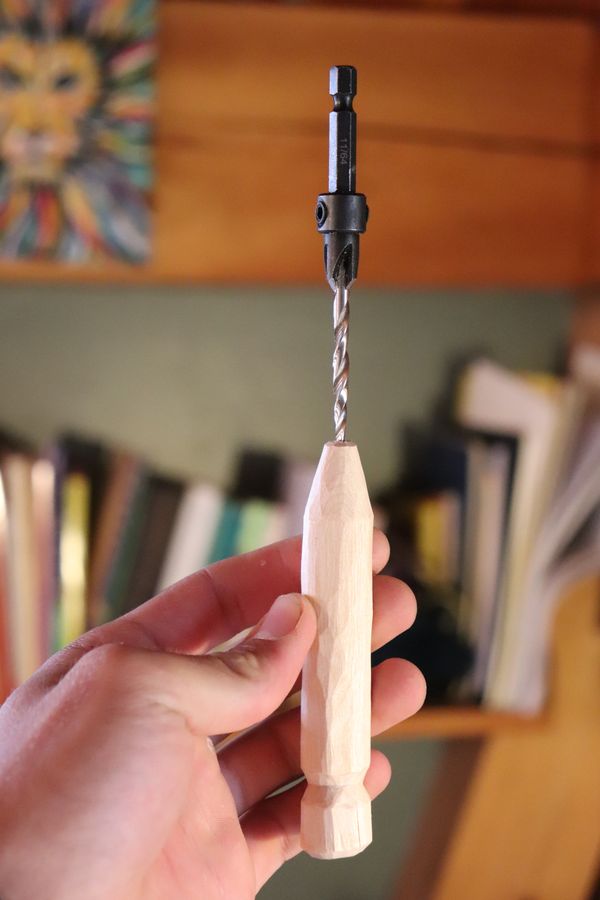
Tricky to hold and drill at the same time. I ended up putting the drill bit into a screwdriver handle so I had more control over the teeny piece as I drilled the hole.
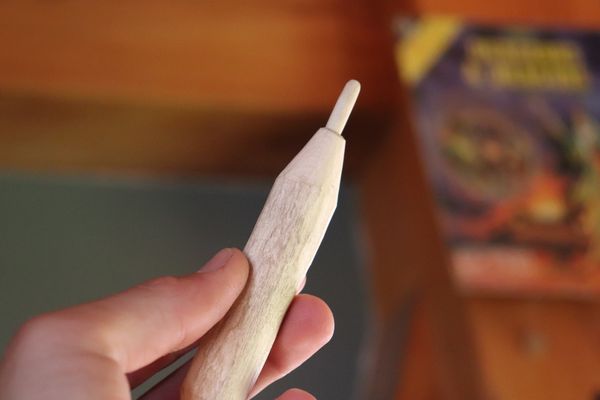
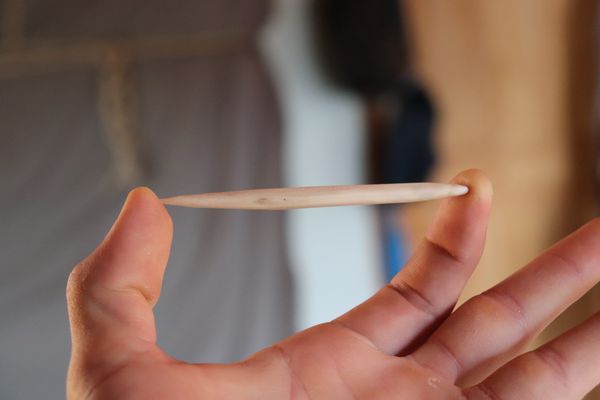
Extremely snug! I had to push it into my desk to seat the tip in further. This is where I discovered my error: I had sanded it too much, and exposed the soft pith of the antler. That means it will wear very quickly and not be much good for flintknapping.
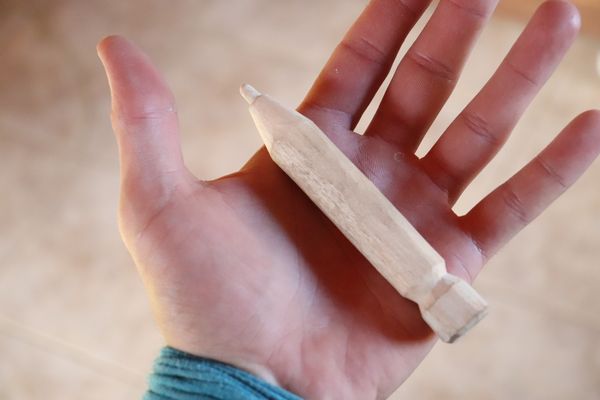
Unfortunately, it looks gorgeous, so I had to take a glamour shot.
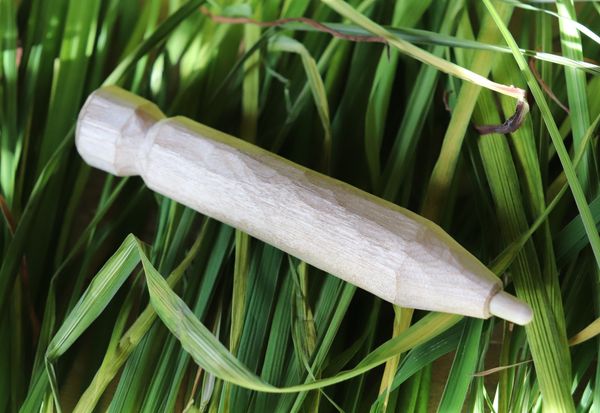
Who knew a stone age pencil could look so good?
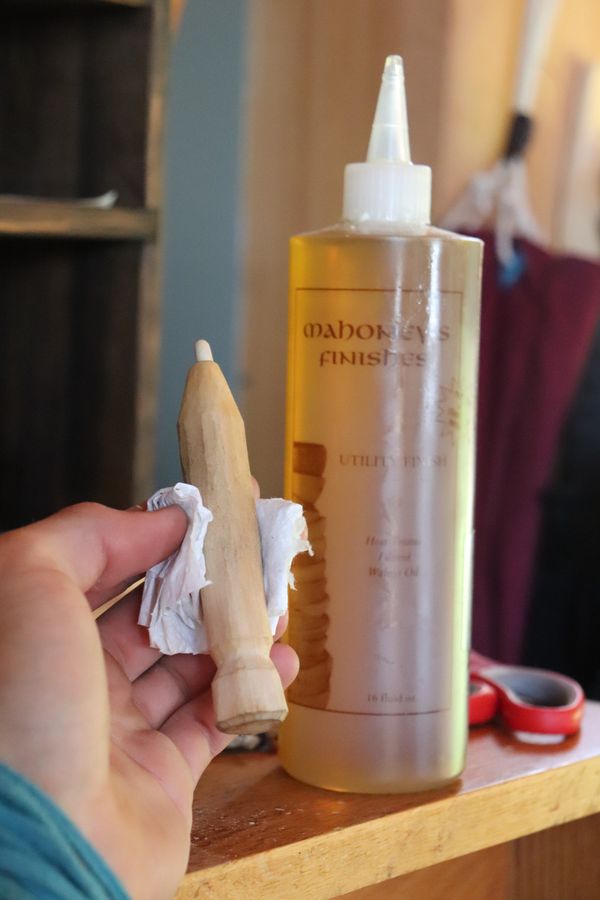
I'll have to muscle out the soft tip and replace it, but for now, I finished the handle with good old walnut oil and set it aside to dry.
The secret bonus project! This piece is sanded correctly and is very hard at the tip. The length gives it a lot of leverage and it can be used as a primary or secondary pressure flaker.
If my understanding is correct, a primary flaker is used to strike the piece of flint being worked, while a secondary flaker is set against the flint but struck by another tool - likely a big rock or a rounded moose antler. In this way, the precision of this small tip can be used in conjuction with the force of a larger tool.
Something I've been struggling with during this project is how to give proper respect to Ötzi and his story as I go forward with summoning his life-objects from far beyond the grave. I asked advice from Byron Maclean, a good friend and someone who works with ancestors and healing spirits for a living.
He shared some stories of working on projects that involved opening channels to communicate and honor ancestors far in the shadows of history. I won't share the whole conversation - these things get personal - but he recommended I set up a space to get right with Ötzi, to thank him, to invite honest communication both ways between us.

The space, my space, is slowly filling with the elements of Ötzi's equipment. I've been lighting candles and burning incense with the intention of giving thanks and asking for Ötzi's help as I follow the work of his hands.
I want to share this element of the project because I think it is dearly important to understand that anthropological finds are not sterile or lifeless. There is talk of an Ötzi curse, similar to the one that is said to have stalked the original breakers of King Tut's tomb. I think these sorts of phenomena are less about angry, vengeful ghosts, and more about the human relationships of which we are always so aware. Talk back to your grandma and you might expect to get smacked around a little. Dig up and loot the catacomb of your great-great-great-great-grandfather who was a king and a half-god... you should expect to at least be put in time-out.
The truth - or, perhaps, my truth, which I'm inviting you to share - is that Ötzi and his story are still as alive as they were in that bloody mountain pass 5,300 years ago. He is a person, a teacher, and an active presence in the world, as are all ancestors. I invite you to connect with yours and get right with those who came before.
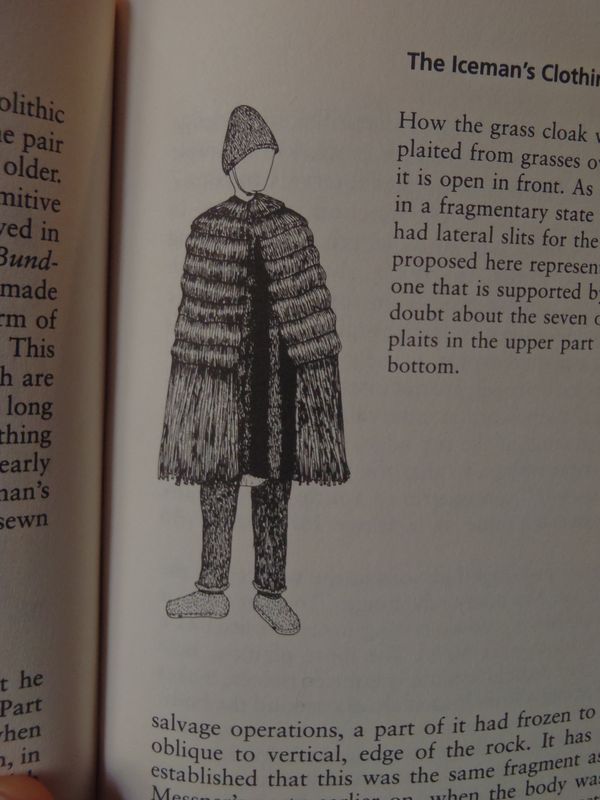
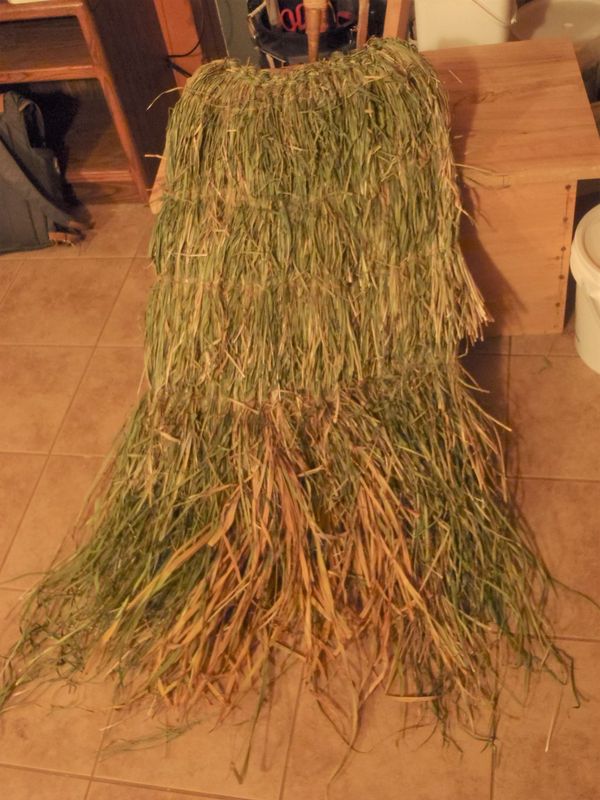
A precautionary warning: Ötzi's official museum website now states that the grass cape is more likely a grass mat, for sleeping or potentially for use as part of the backpack structure. This interpretation is probably scientifically sound but ignores the aesthetic and comfort of a fine fibrous cloak. I will be vetoing this interpretation in favor of Dr. Spindler's original thesis that the grass "mat" was used as clothing.
In either case, the method of construction and the final product look very much the same, and so we will proceed regardless of fashionability.
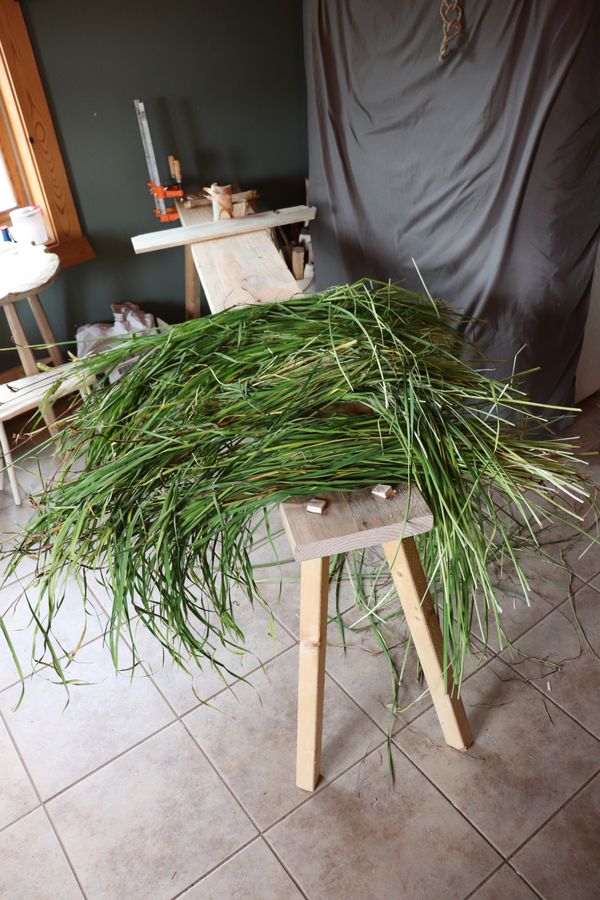
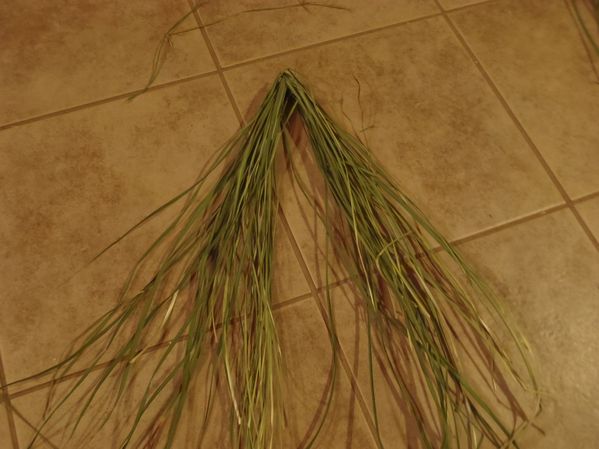
With the help of the ever-resourceful Emily Derke I was able to harvest some lovely long iris leaves - a material used for all kinds of basketry and weaving applications.

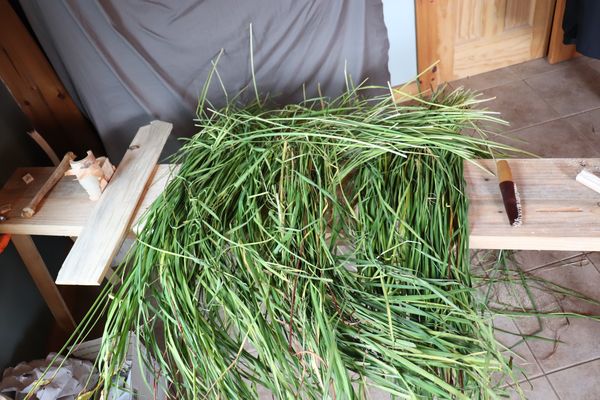
I placed the leaves in the sun and flipped them every day to aid drying. Like most natural materials, grass fibers shrink and warp after they are harvested. Unless you want a loose basket or a weak cape you should wait for a while until the material has dried to its final size.
I let the grass dry for two weeks and even then I experienced some post-weaving shrinkage. Unfortunately, unlike sinew, plant fibers shrink along their width, not their length. This means that all the fibers will get thinner and not shorter.
It is sometimes necessary to re-wet this sort of material, but mine was plenty flexible so I went ahead and started weaving.
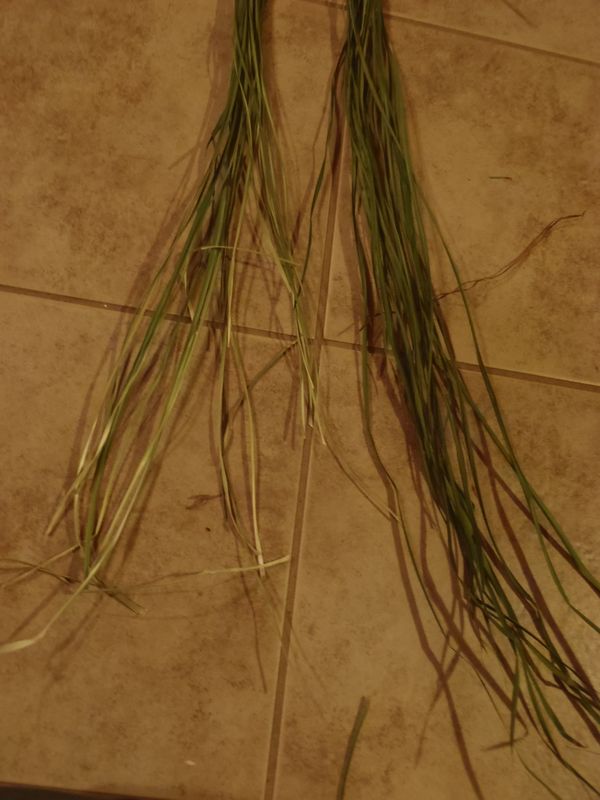
These grasses were obviously aligned in the same direction, as all plants I'm familiar with grow upwards. However, this means they are imbalanced, as the ends are shorter than the roots.
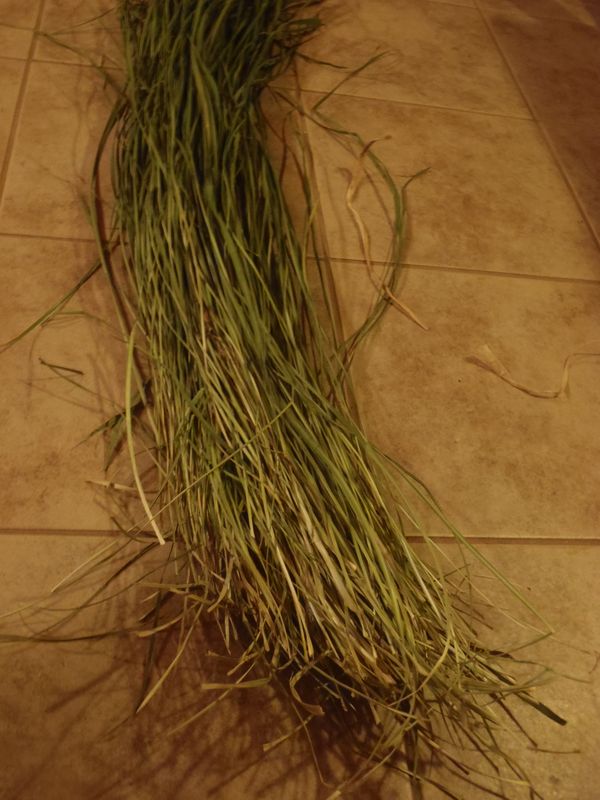
It's unclear to me if Ötzi did this step, but I seperated bundles of grass and made sure each bundle had grasses pointing in both directions. This is a technique when weaving grass baskets to get even thickness across the whole piece.
I bent each bundle in half to weave them, so even if they shrunk they wouldn't fall straight out.
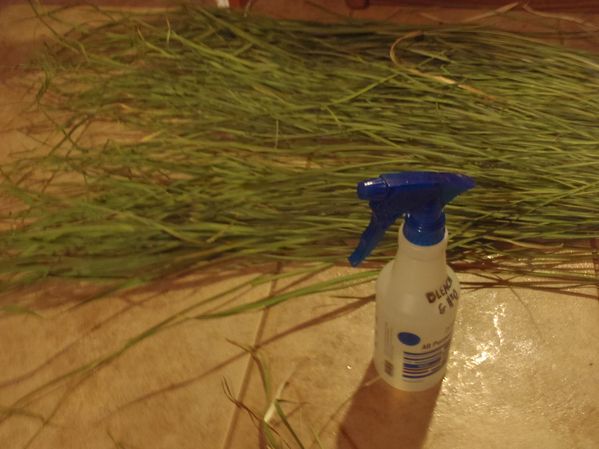
Remember to hydrate! Grass fibers are easily broken when dry. After I started weaving I noticed some of the grass was getting a little crispy so I spritzed them with water.
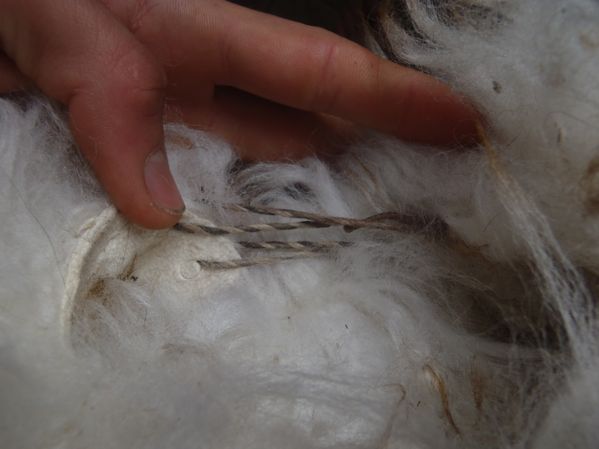
Twining two cords between each bundle I was able to attach them firmly to the previous row, and two rows of twining seemed enough to hold solid. I left a foot or so between adding bundles. I realized halfway through that this would allow your arms to come out of the cape when it is being worn!
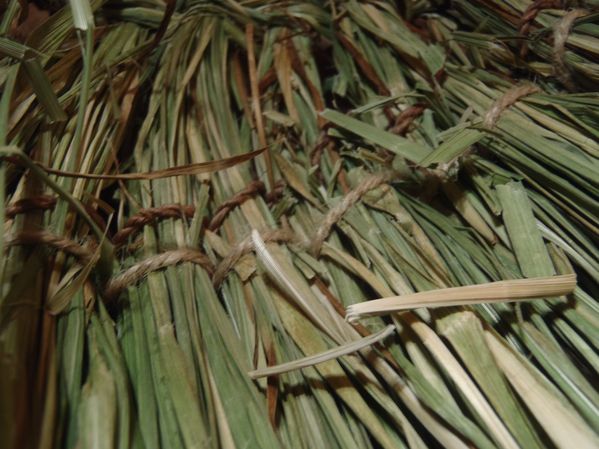
This took a lot longer than I had thought. Ötzi didn't use cordage, but simply twined pieces of grass in between each bundle. I tried this at first but it was very difficult for me to tell which strands of grass were bundles and which were twine - so I switched to rope.
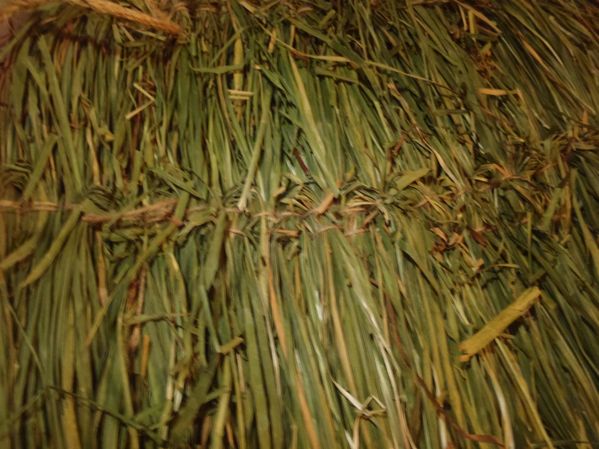
And that's it! I ran out of material but I could tell that this was a very simple way to solve a lot of problems. It is very warm to wear, very soft to lay on, quite waterproof and obscenely fashionable. Now, please excuse me, I have to sweep up. My room looks like a barn.
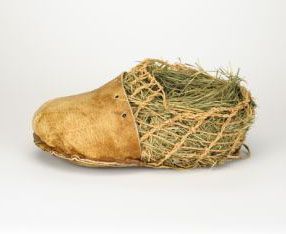
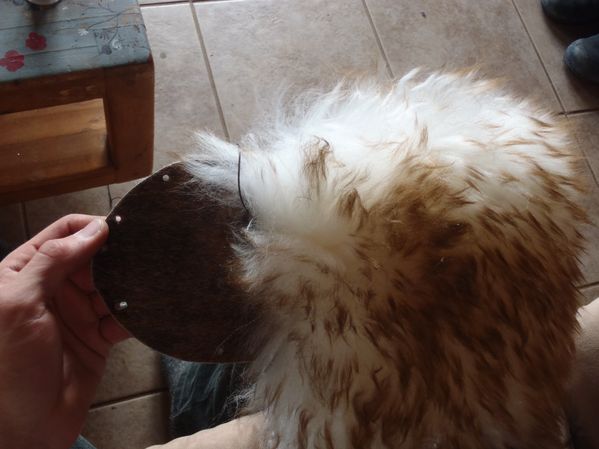
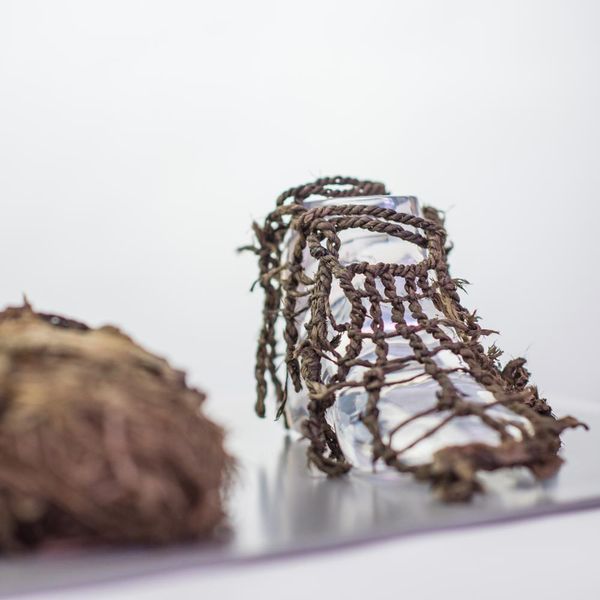
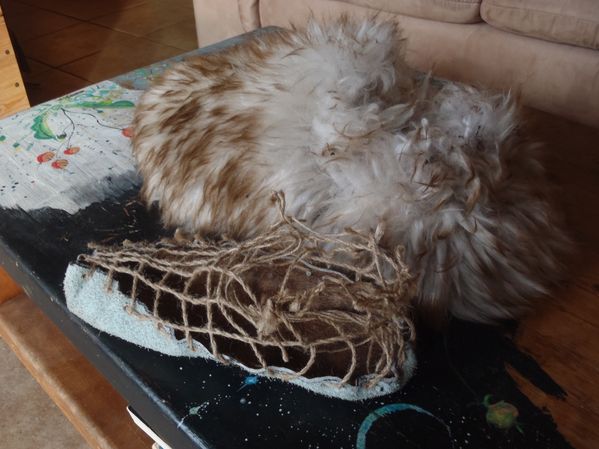
There is much argument about Ötzi's shoe. The above image, a modern recreation, is apparently very comfortable. These shoes were made with bearskin on the soles, deerskin on the uppers, and stuffed with straw, all in accordance to the genetic testing done on Ötzi's leather.
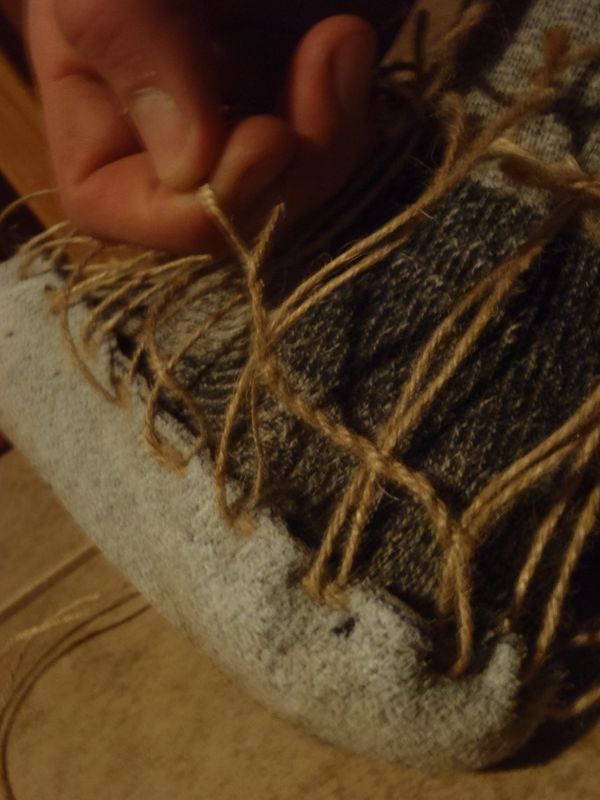
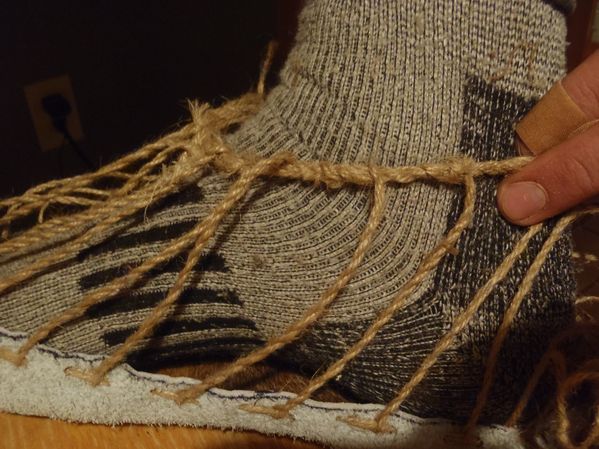
Even though the ropework looks totally baffling, I went ahead and gave it a try.
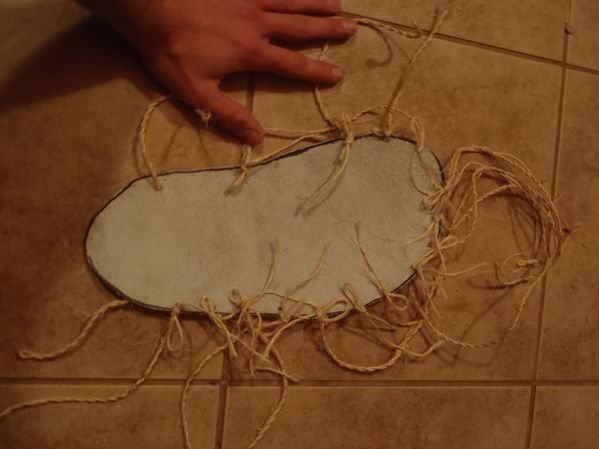
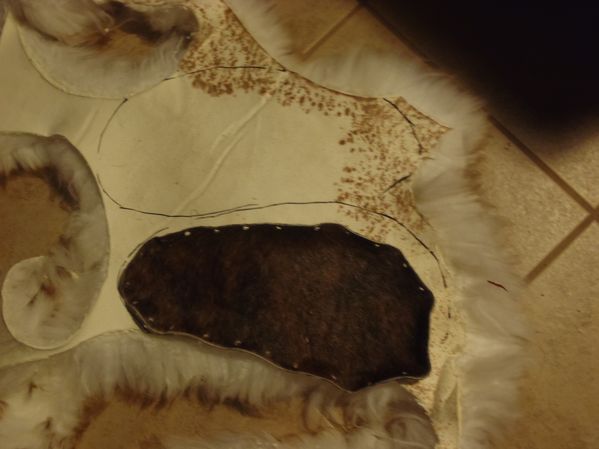
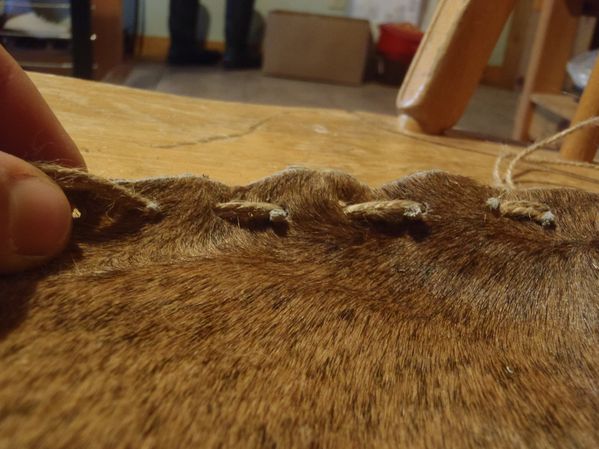
I traced my foot on some cow hide and cut out two soles, with the fur facing inwards. Punching some holes on the outside for attachment points, I started to twine in some rope.

It is, I think, obvious that I do not know what I am doing, and so I do not feel ashamed in admitting it to you, dear reader.
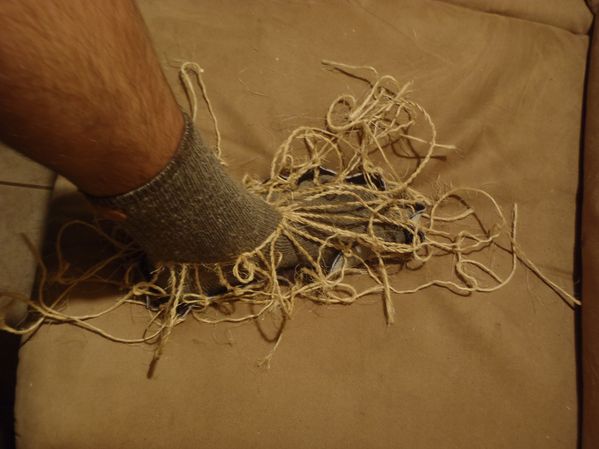
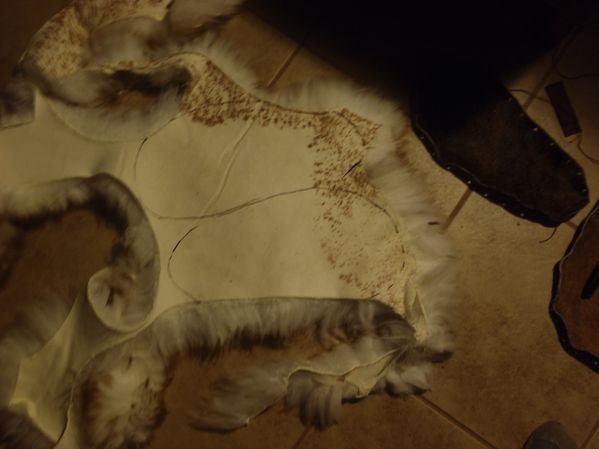
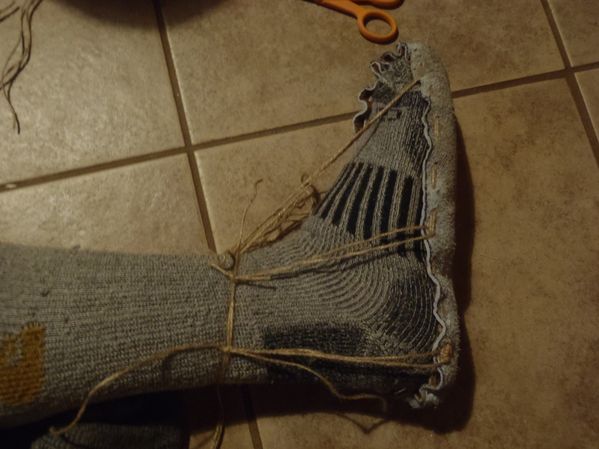
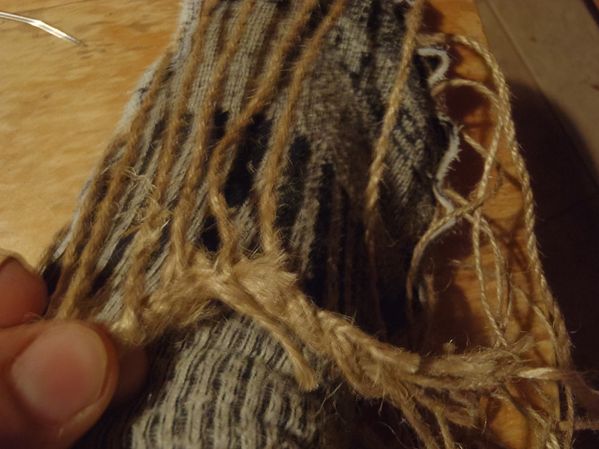
In adjusting the tension of the ropes, I would cause other sections of the shoe to fall apart.
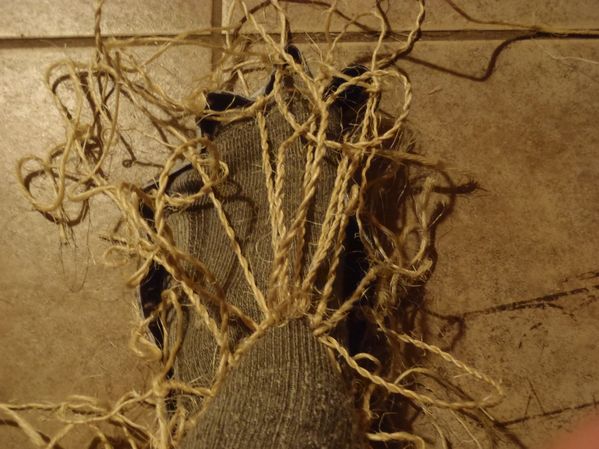
Eventually I had tightened everything so much that the ropes didn't even come above my ankle. At this point, I decided to sew on the uppers, instead of continuing to frustrate myself with the ropework. I didn't feel capable enough with the material to follow Ötzi's example.
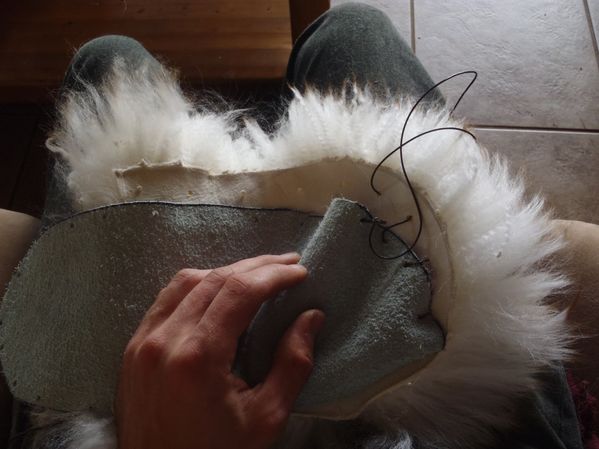
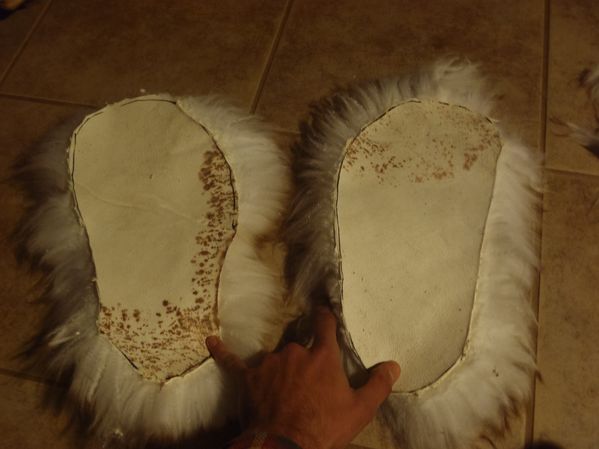
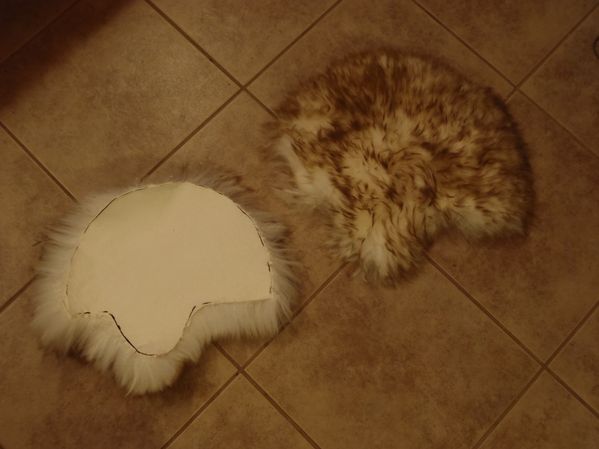
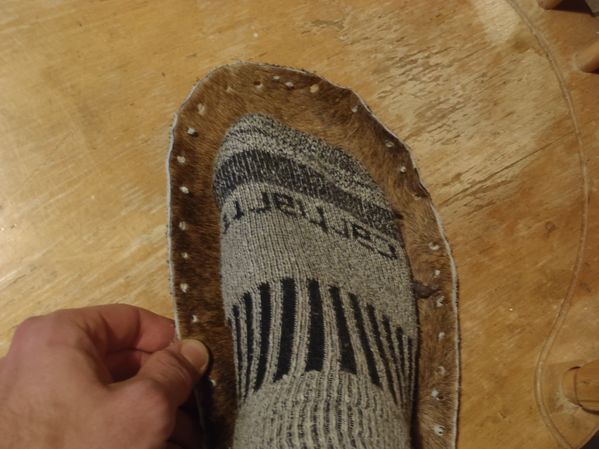
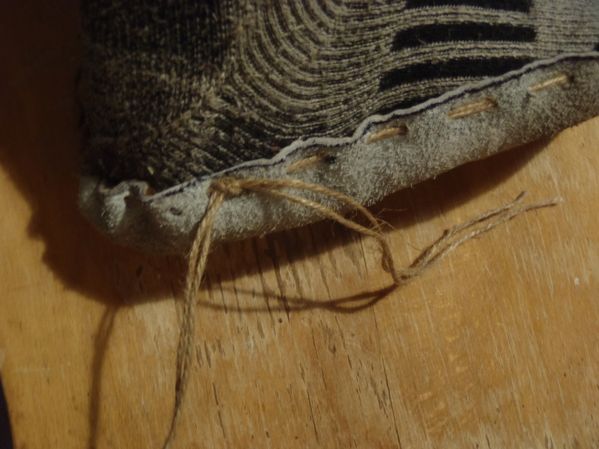
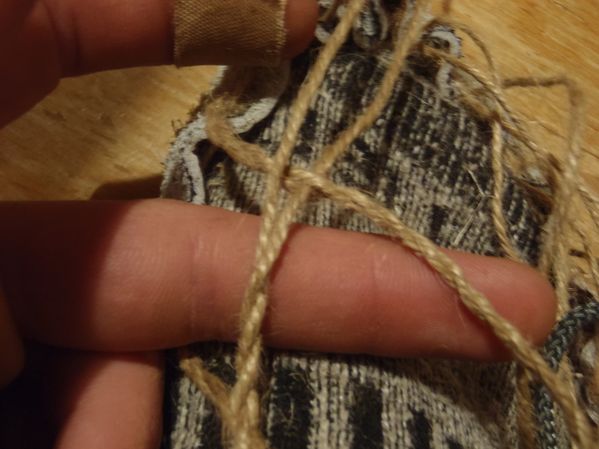
Discarding the rope, I cut out some uppers from sheep's hide. The toe-end of the uppers is a half-circle to match the toes of the sole. I punched some holes and went for it.
Warning: the excessive fluff of my sheep's hide can make it difficult to see exactly what's going on with the stitching here. Consider yourself warned.
The heel of the shoe is a half-circle of sheep's hide. At this point I was getting pretty extemporaneous, as the information on Ötzi's shoes is very scarce. I came to a point many times during this project where I could learn no more from journal articles, blog posts, or videos. At that point I would jump off into free experimentation to see what I could find out for myself.
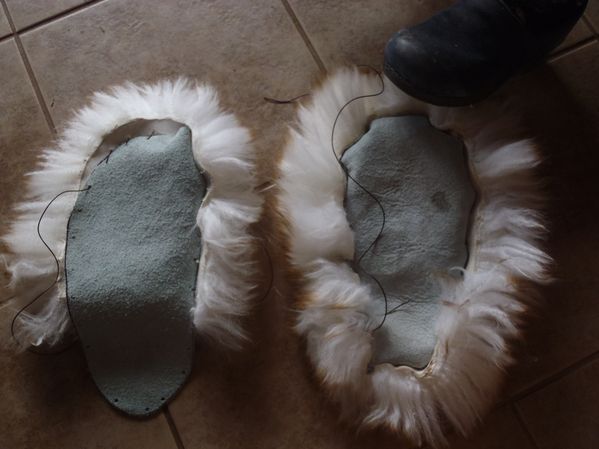
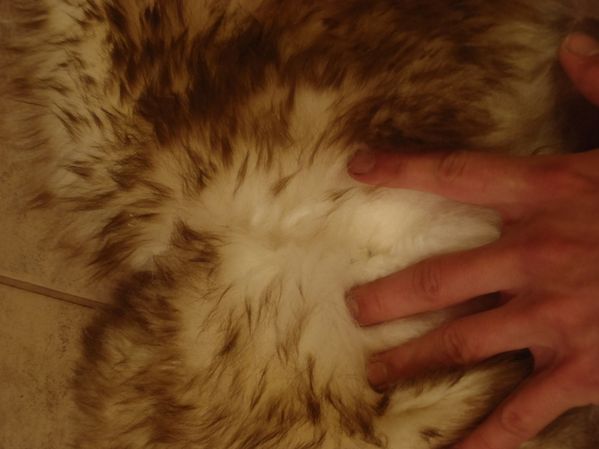
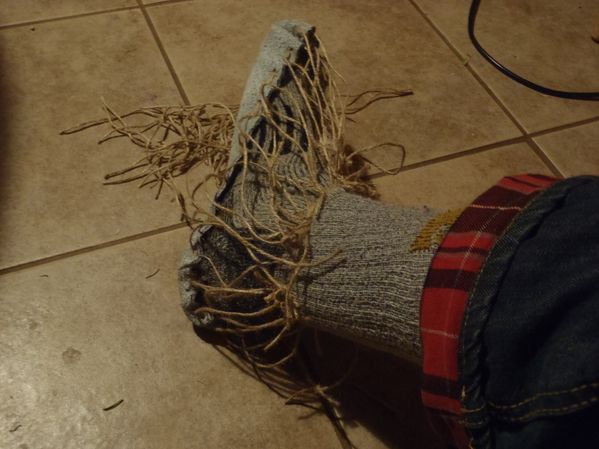
Here's what I learned for myself: I think the rope section was, actually, very important. The shape I ended up with here is more of a slipper, and doesn't stay on the foot at all without some kind of support or tie-on. Also, the cow hide as an inner sole was very slippery and uncomfortable, so I decided to make a second sole, cut from the impossibly fluffy sheep's hide.
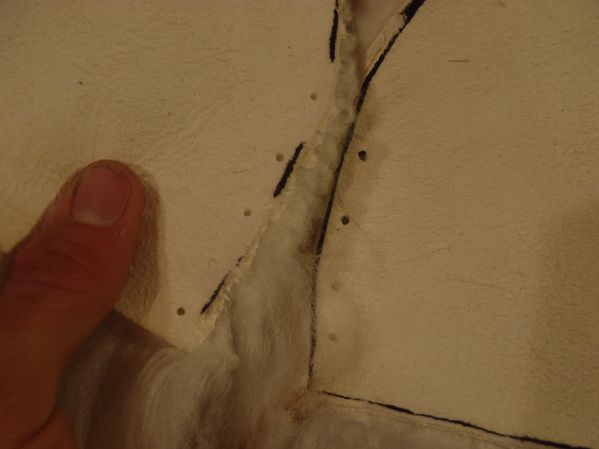
I also decided to punch more holes. As you can see here, the holes in the sole are nearly an inch apart, and this simply did not give enough strength to the stitch. In fact, the soles started to pucker out and my toes were slipping through the spaces between stitches.
I did not return to the ropework.
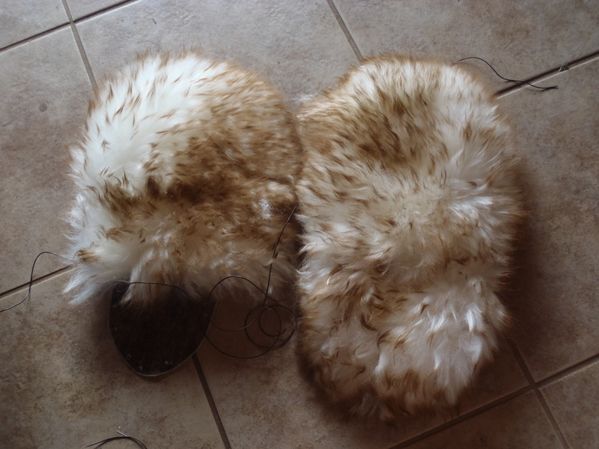
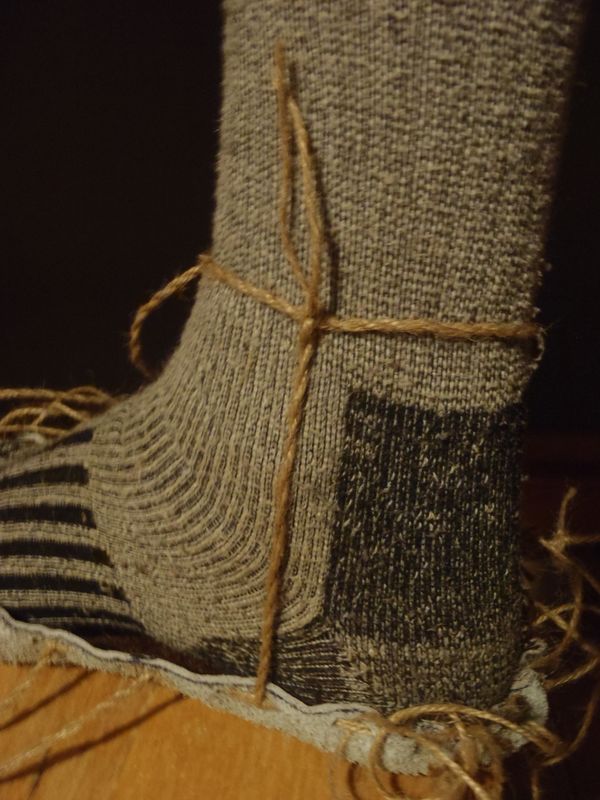
Ötzi's slippers, it seems, covered his ankle, and from images and reconstructions it looks to me like he only had leather uppers around his toes. The rest of the shoe was loose grass stuffed into the rope net-sock-thing.
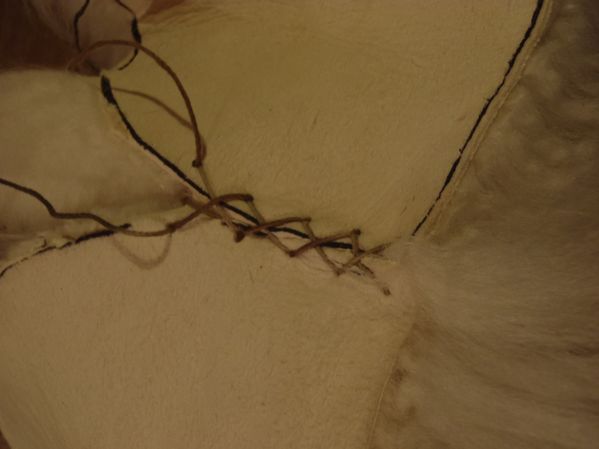
Going fully outside the scope of Ötzi's initial design, I added some stitching to connect the front and back uppers. Now the slippers stay on and are actually wonderful in the snow.
These shoes ended up being the least faithful object of this whole project. However, what I am learning about Ötzi is that his crafting style is very dynamic. Nearly all of his equipment was in a state of being made or being repaired. He was carrying scraps of rope and leather to remake and fix up anything that broke or tore or popped open. He favored stitches and shapes he knew were strong and that he could make well. Making these slippers I had a distinct purpose in mind - to have good traction and good warmth in the snow - and I had only what resources and skills were available to me. Even though my design went far off from Ötzi's blueprint, I think my ötzislöjd was in top form.
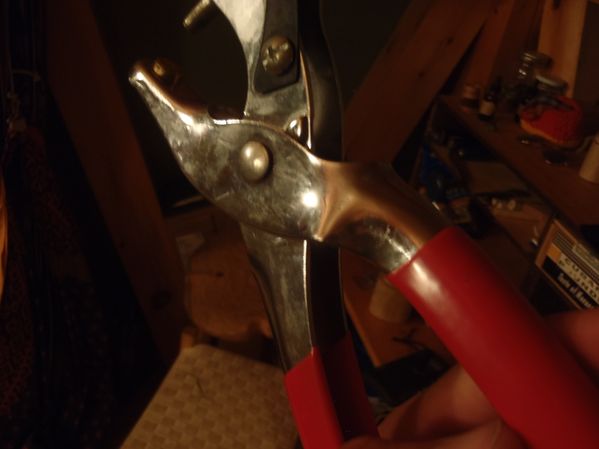
A word to the wise: make sure to punch your holes from the soft side of the leather, not the furry side. If punching from the furry side you may accidentally squeeze the living hell out of your hole-punchers and bend the crap out of the handle. This has been a public service announcement.
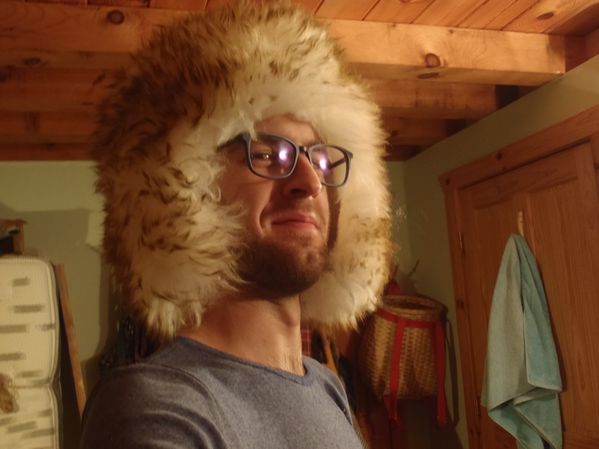
Onto the most fashionable element of Ötzi's ensemble: the hat.
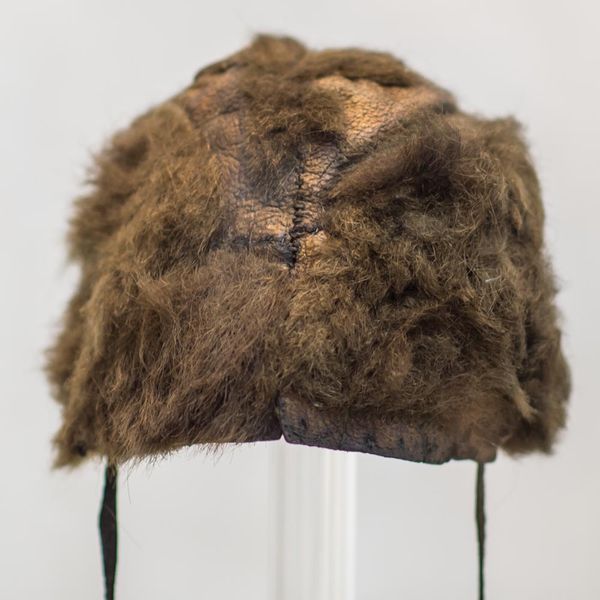
Made of bear hide, the hat was made fluff-side-out. The overall shape is very simple - a dome for the dome.
Instead of measuring my head first, as I would advise for you, dear reader, I just went ahead and traced a bucket lid on some cheap felt and hoped for the best. You'll notice I traced slightly more than half of the lid - my idea here was to make a hat that would come down around the curve of the head and fit nice and snug.
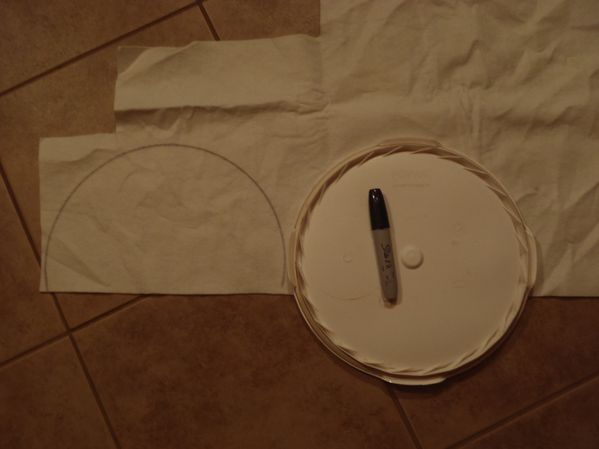
This felt was just to test the form - and guess what, it worked great.
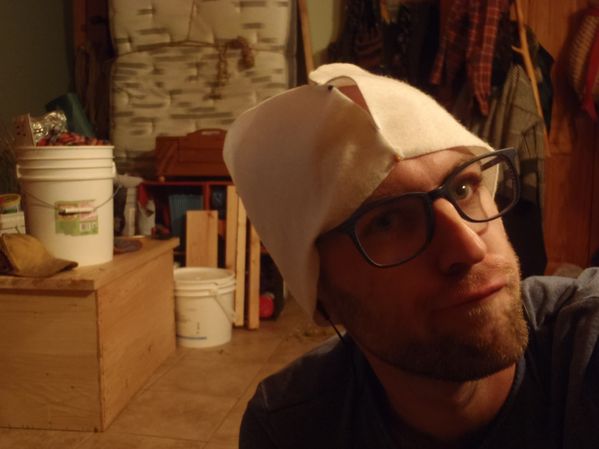
I decided to add ear-flaps. Why? To be honest, I had falsely remembered Ötzi's hat as having ear flaps. And, guess what, I wanted some ear flaps. After I finished this first hat, I made a second smaller hat with no ear flaps, a much more faithful design. Guess what? It ended up way less cool than this one.
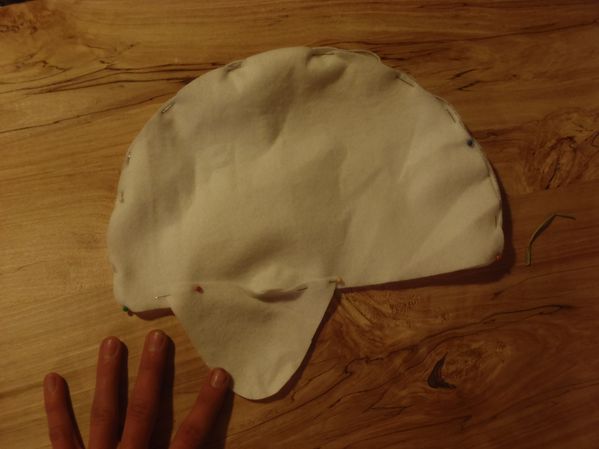
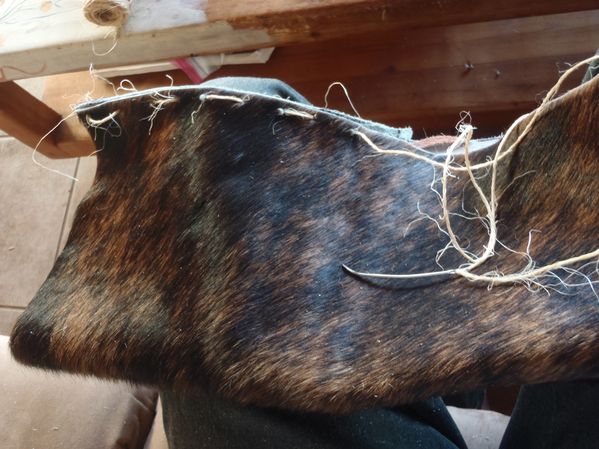
After fitting the felt prototype onto my head, I traced the outline onto my sheep's hide. I triple-checked to make sure I was making two opposite shapes, instead of two left halves or two right halves.
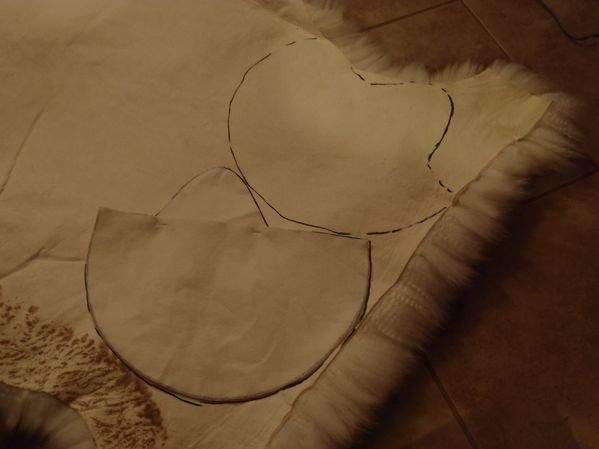
You'll notice here that the ear flaps are about 1/3rd of the way across the width of the hat. Wearing the finished product, I think that is still a bit too close to the face. If I were advising you, and I am, I would advise you to push the ear flaps closer to the back of the head, maybe 1/4th or 1/5th of the way across the width of the hat-half.
Now sewing up the halves with some hemp fiber and a blunt sewing needle. A blunt needle is best for leatherwork, especially soft leather like this, because the holes should already be punched before stitching begins. Using a sharp needle leads to the creation of improvisational holes that are neither needed nor aesthetic.

Because of the excessive fluff of these pieces, I sewed the hat inside-out. I also only punched a few holes at a time, to make sure that both halves were aligned. I am sure there are tools or jigs or techniques to lay out all your holes perfectly, but I punched as I went and the result was excellent.
I used both ends of my thread to sew two overlapping whip stitches. Most of Ötzi's stitching was whip stitching, which is simple and strong. Two whip stitches going opposite directions creates an x-shaped stitch, which can be seen on some of Ötzi's gear and makes for a double-strong seam. Remember, the strength of a stitch doesn't come from how hard you tighten each loop, but from firm tension and steady repetition.
From the outside, the strong stitch and the forest of fluff means the seam is practically invisible.
Feeling good.
Pictured below: the earflapless hat.

You'll notice that I did not include the chin-strap from Ötzi's original hat in either of my designs. That's because chin-straps are geeky and looking like a total dork is outside the scope of this project.
Thank you for continuing to read these posts despite my ridiculous titles.
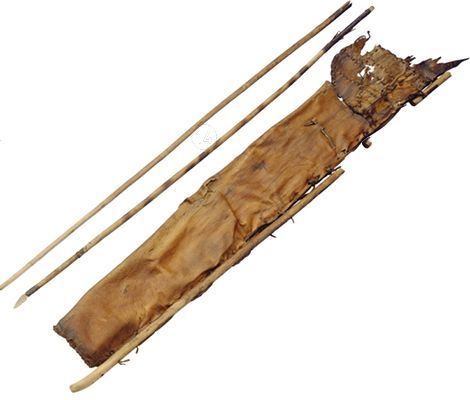
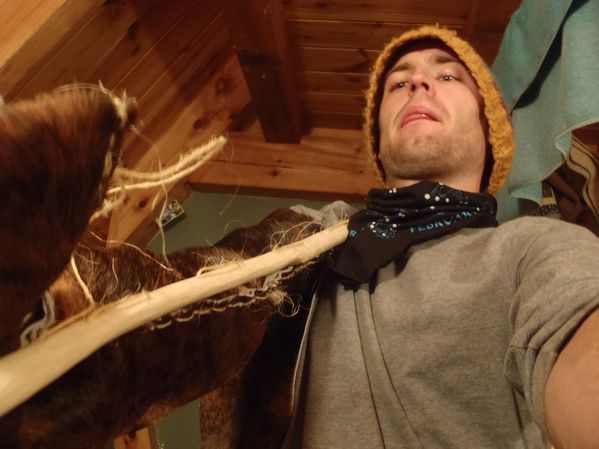
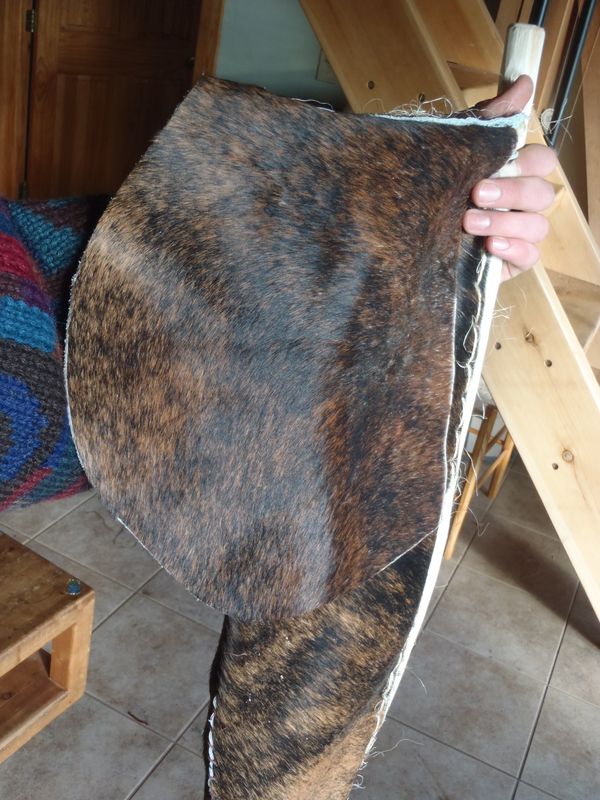
Ötzi's quiver was a roughly trapezoidal bag of hide, a simple shape for carrying arrows and some other fungus and crafting scraps.
One side of the bag was stitched inside-out, giving the bag a more open mouth. I used a tight whip-stitch for that seam, seemingly Ötzi's favorite. The bottom of the quiver was also stitched inside-out, which flattens the bottom and allows more open space for goodies.
I used the cow hide I had purchased in bulk to put together this excellent shape. After finishing the two inside-out stitches I straight-stitched along the remaining side with some rope fibers - different from Ötzi's preferred strips of leather but, I think, strong enough.
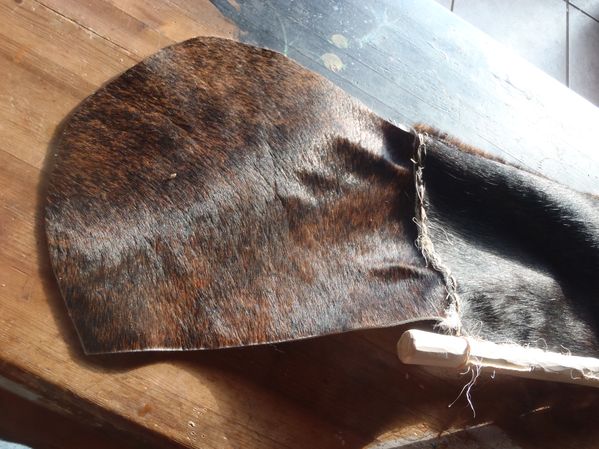
I cut and de-barked a straight young branch just a bit longer than the quiver, just like the original. I could already notice that without a stiff branch the quiver was wobbly and difficult to manage.
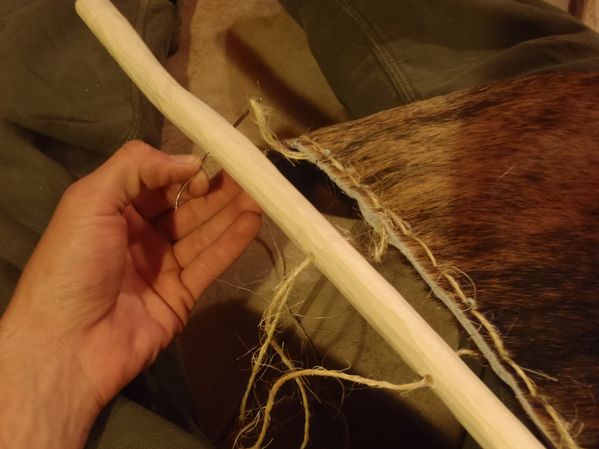
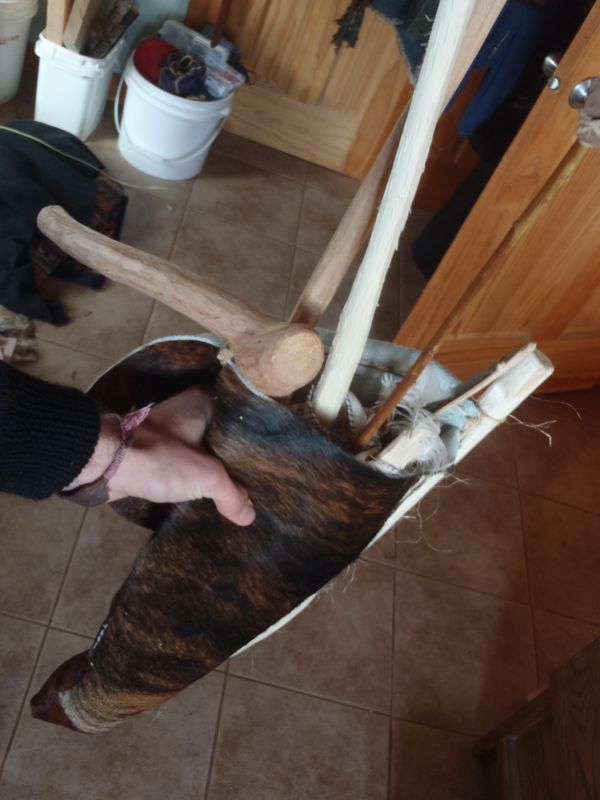
I drilled some holes in the branch - using a hand-drill with a steel bit, not a flint awl as Ötzi surely used - and stitched it onto the side.
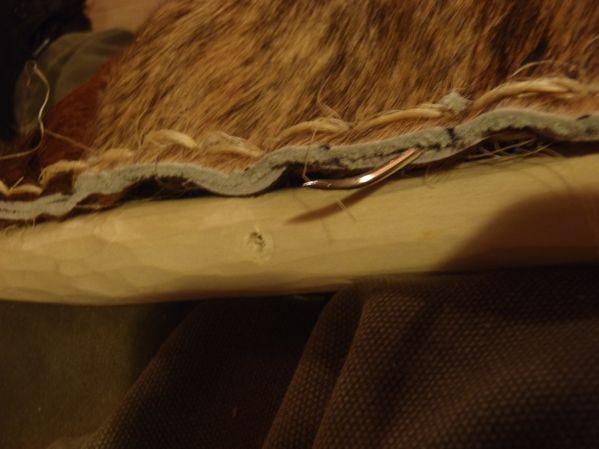
I was not sure how exactly Ötzi tied off his ends or how he would have stitched into the quiver to attach the branch, so I did the best I could and tied some tight knots on either end. Something I had come to appreciate about Ötzi's work is the separation of all the elements of a piece, which allows for much easier repair and modularity. I worry that my stitching was too intertwined with the stitching on the edge of the quiver, and that if one stitch broke, too much would come apart.
A frustration I have with much modern clothing and technology is that all the pieces are indeed so interdependent that a fault in one element can break the whole piece, in the way that a temperature sensor can break a whole car or a cheap pants seam can unravel the whole sheet of cloth. I will certainly carry that lesson forwards with me after this project, and I aspire to build object that are easy for anyone to fix up and make good as new.
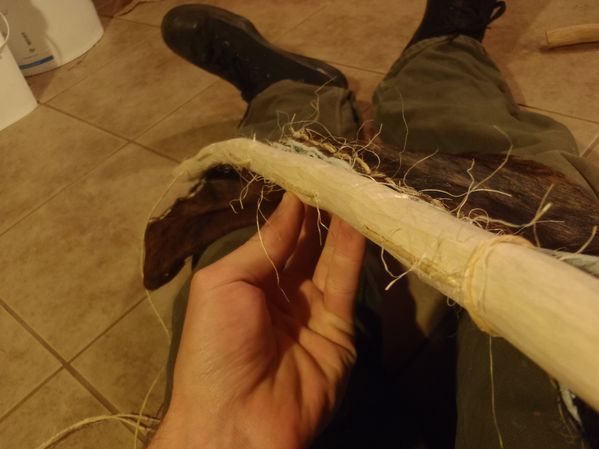
Stitching the end of the branch was a real trick! Luckily the quiver was only just a tad shorter than my arm, so I was able to reach all the way in. If I were to make this quiver again - or if you, dear reader, are following along at home - I would strongly recommend to never make a bag longer than your reach.
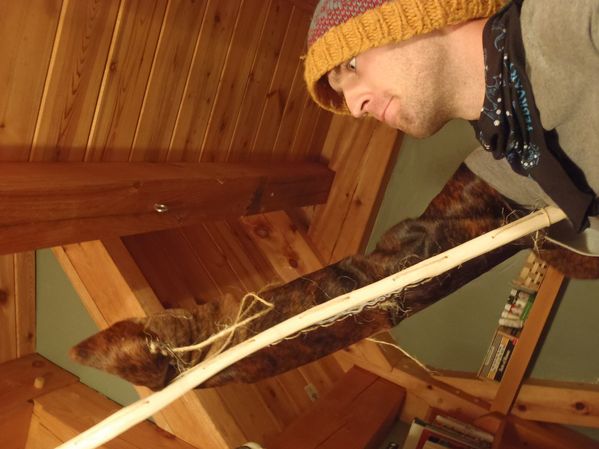
Notice the hyper-concentration indicated by the stuck-out tongue.
Adding a curved flap was quick and easy. There is talk about a possible closing mechanism, but what I learned from the banana was that a good pocket doesn't need to be fastened close. I think the genius of Ötzi's design work was to make a kit that kept everything easily accessible without fumbling with buttons or zippers. So I left the flap clean.
Nobody knows how Ötzi carried his quiver. There could have been a backpack-like strap, or maybe it clipped onto his belt like just about everything else. Walking around with the quiver, it definitely banged around my legs when hanging on my belt. However, I wonder if Ötzi carried it on his back when hiking, and on his hip when hunting, in order to grab arrows quicker.
The quiver holds very, very much. Ötzi had all kinds of little scraps at the bottom of his quiver, which would have certainly been hard to get at considering the quiver was mostly used for holding deadly-sharp flint arrows. Shaking out my own backpack I discover a bouncy ball, two paperclips, and a shockingly large conglomeration of lint, so I am not one to judge the scudge in the bottom of another man's bag.
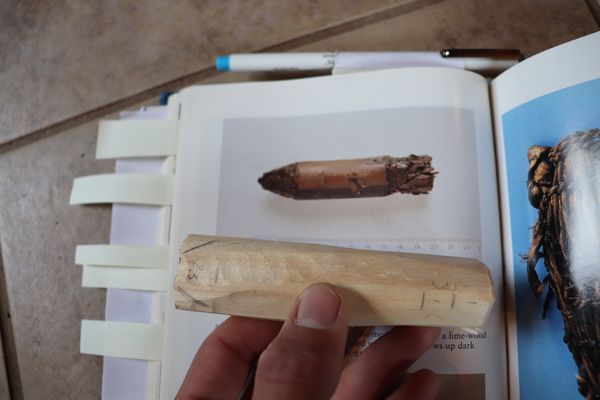
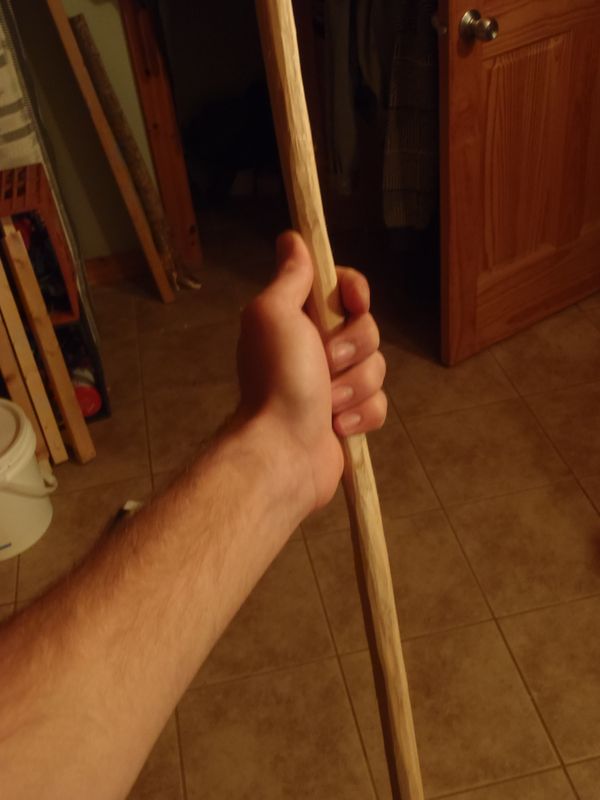
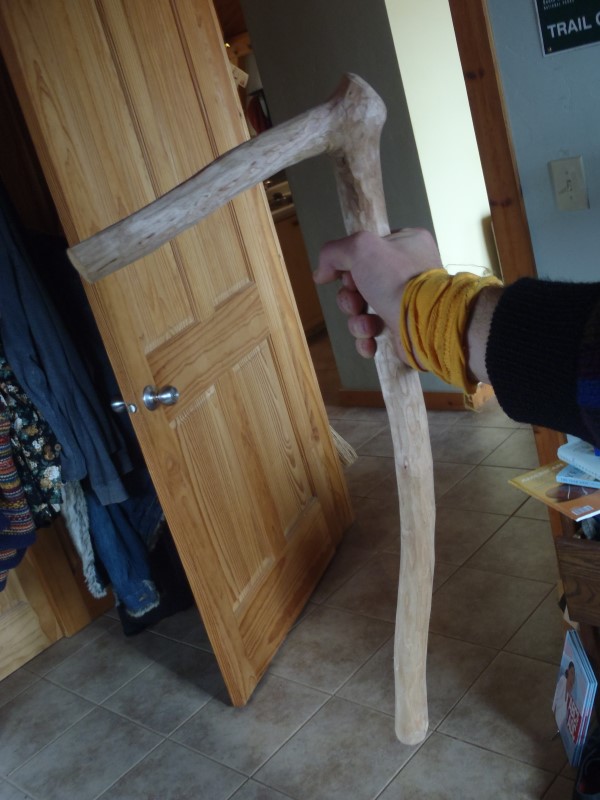
Making the bow was a short adventure because it is so simple and so unfinished. I was gifted a lovely piece of black ash by Mike Ulen, local tree-destructor, and got to work splitting a nice piece.
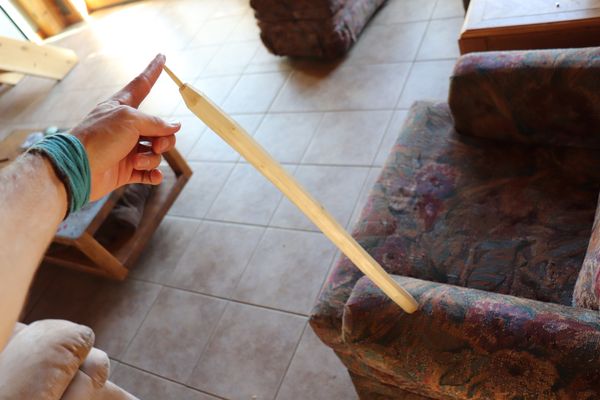
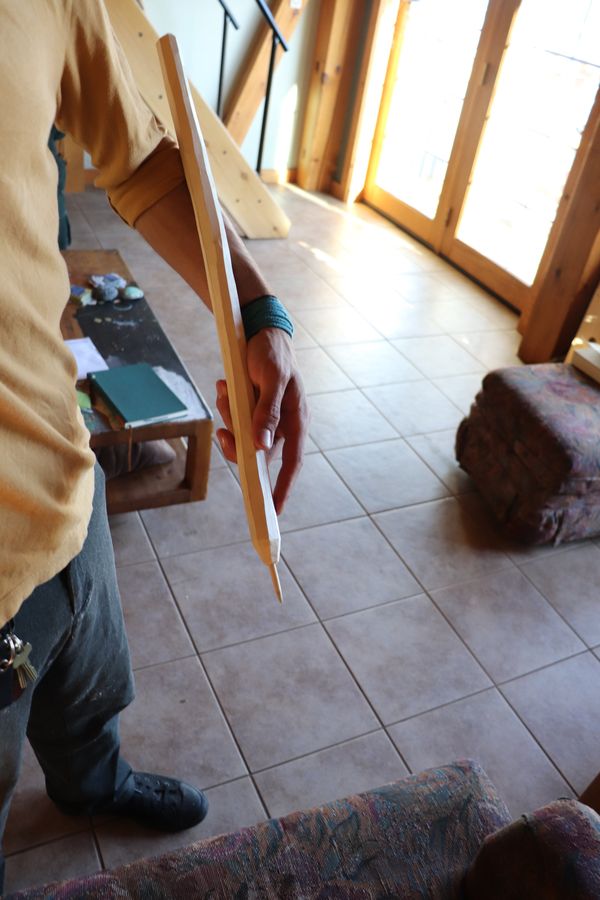
The bow is a very simple straight rod with a D-shaped cross-section, slightly tapered on both ends. That's it. So, I took to the branch with a small drawknife and shaped it.
This ended up being a bit shorter than Ötzi's stick, which was nearly as tall as he was. Some have experimented with hiking around in Ötzi's gear, and have said that the bow-stave made a brilliant hiking stick. Perhaps he intended to finish the bow whenever he made it to an area with more wild game.
There was some long, strong plant cordage found with Ötzi, which has been sometimes identified as a bowstring. Reading some wooden bow-building manuals, though, there is a consensus among experts that grass fibers simply aren't strong enough to bend an adult-size wooden bow. It seems that Ötzi was perhaps waiting to harvest some sinew for his bow, if he ever did intend to finish the piece.
EVen though this piece is short, I can attest to the fact that it is lovely for a wander around the woods. Espcecially in deeper snow, it helps to have a poker to test the trail ahead. Yeah, I'm pretty good with a bow-stave.
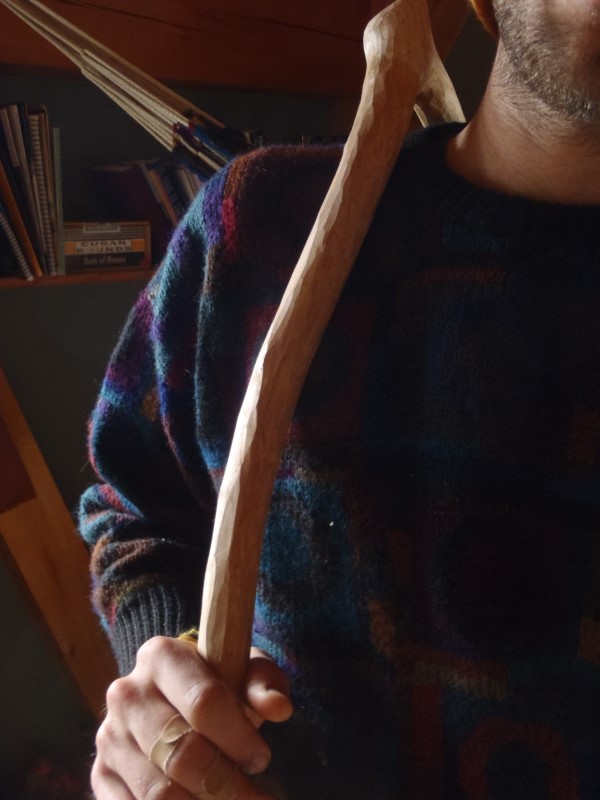
And now, the most iconic and mysterious element of Ötzi's tomb: the axe!
The haft of Ötzi's axe is extremely strong. He seems to have taken off a branch that stuch out at a right-angle, and kept a huge amount of material on the joint, creating a shape which I think resembles the knee of a troll.
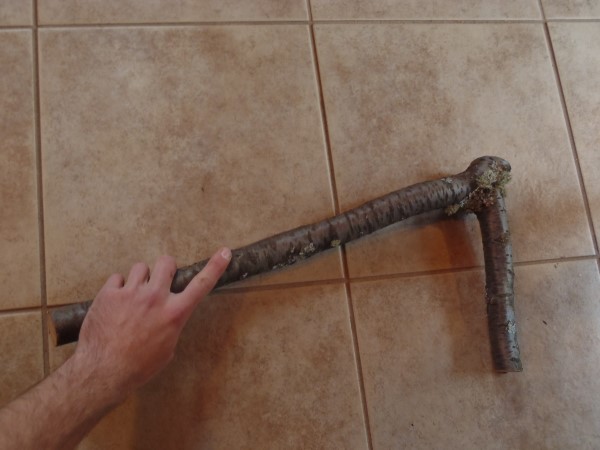
I cut down a similar tree-section and got to work de-barking and smoothing the surface. I love the long handle and long head. It feels very different from a modern carving axe or wood-chopping maul, which favor heavy and compact shapes. This axe is light and long and feels dynamic in the hand.
Before starting in on the copper I noticed that this axe-shape fits perfectly on my shoulder. I wonder if Ötzi carried it like this. It's a small thing, but every time I make something of Ötzi's I am struck by the superb ergonomics. It's a valuable lesson that designers nowadays could learn from: simplicity is often much more comfortable on the body than complexity.
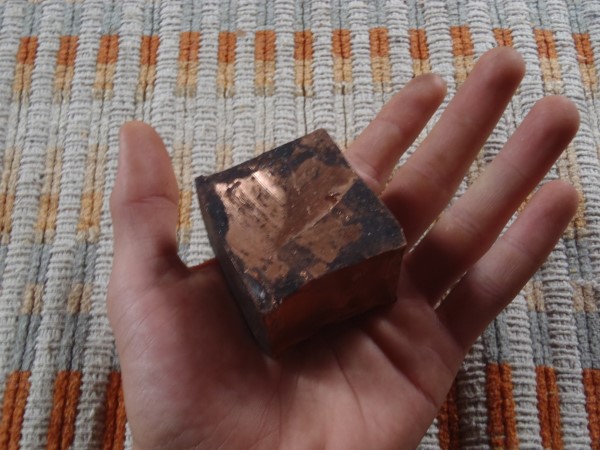
Now, the copper was a true challenge. I have never worked with copper before and my research said that Ötzi's axe was cast in a mold, a technique I have never even seen done and requiring resources and expertise I do not have available. So, I cheated.
I bought a brick of nearly-pure copper and attacked it with a hacksaw. I figured if I could cut out a shape that approximated the axe, it would be almost like casting it. This was more difficult than I thought it would be. The second round of battle was done with an angle grinder. I gave up that fight after the grinder jumped out of the cut and nearly buzzed my face in half. I gave up and handed the chunk over to Ben Byron, sailor supreme and tool wizard. He chopped off a nice chunk for me and I started hammering away.
The thing about copper is that it work-hardens, meaning that after a few hammer blows I had made an invincible brick. Even though copper is soft to work, it hardens quickly. I was foiled again.
I am sorry to say I simply ran out of time, that most precious and regretful resource. The axe is unfinished. Someday I may meet a metal-caster who will help me to complete the project - to complete the most iconic imagery of Ötzi's kit - but for now, it will live as a chunk of strange metal, unformed and work-hard.
This was not my first or my last failure as an Ötzi wannabe. Every experience with experiment for me was frought with challenge and a meeting face-to-face with my own contemporary lack of material skill. I am in awe of my ancestors!
There are a few pieces of Ötzi's clothing that I did not attempt to recreate. Partly because his clothes require a lot of available material, and partly because, by this point, I was thoroughly ashamed of my crafting abilities as compared to my prehistoric teacher. Going from simple shapes to the complex construction of clothes, I think, is simply beyond the skills I've built so far.
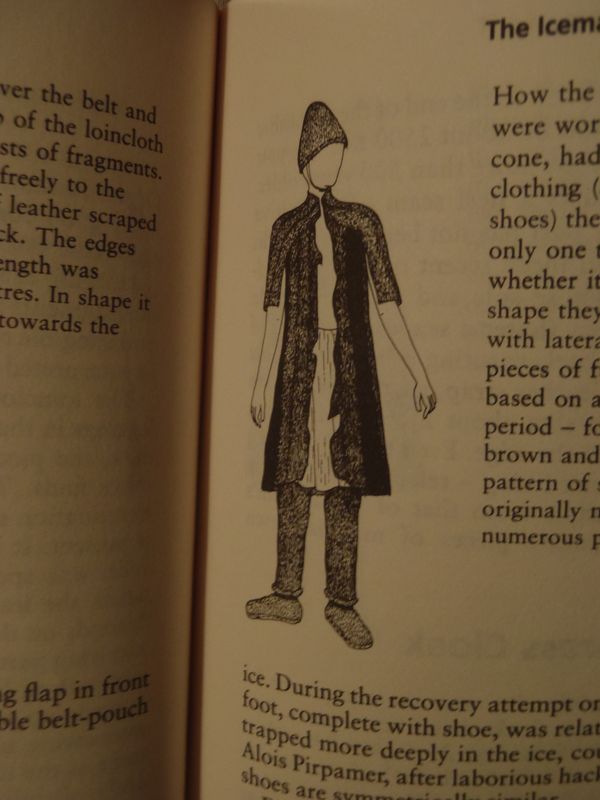
Ötzi had a coat made of several alternating strips of goat hide. One day, maybe, I'll have the goat-seamstress abilities to make this wonderful piece, but not yet.
Ötzi was wearing a loincloth a simple rectangle about 6 feet long that was slightly narrower in the middle. It was tucked into his belt nice and snug to better hold the family jewels. Six continuous feet of soft leather is, unfortunately, a lot of material for something I don't think I'd be using very often. If I were to make the loincloth out of what I have available - thick cow hide - I have a feeling that I would be very uncomfortable.
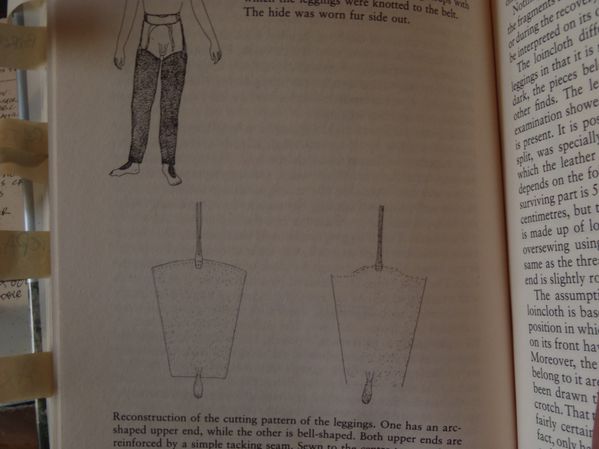
The leggings would also require a lot of material, and while they seem simple, I get the idea that a comfortable pair of leather pants is a worthy challenge for a craftsperson with thrice my experience. I'm interested in the shape of the leggings, especially that little dangle at the bottoms - it seems like Ötzi had stitched on some hairy bits to act as shoe-tongues. The shoes were snug around the legging dongles, the leggings were tied to the belt, and the belt tightened the jacket. Makes you wonder how often Ötzi bothered to change his clothes.
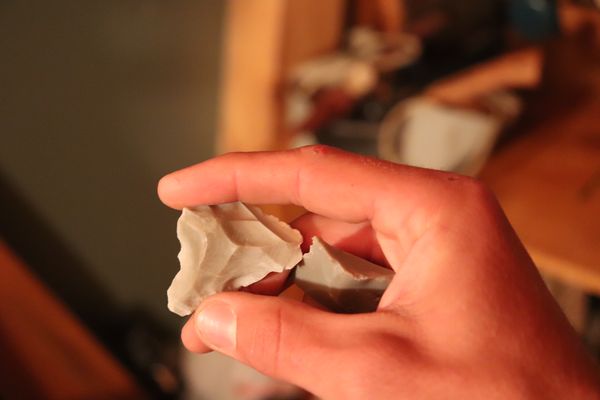
Flintknapping is tricky. Not only do you have to keep a solid edge, but there is an enormous risk of bloody messes due to the razor-sharp flecks flying in every direction.
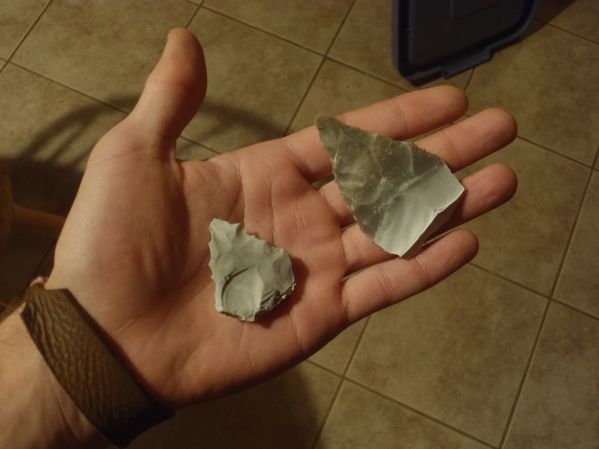
Nevertheless, I persisted. Bandaged and humbled I ended up with some very amateurish blades that would, given enough elbow grease, cut through firm butter.
Unfortunately and embarassingly, I had to take off a lot of material before I could even start to wedge the blade into the handle. In flintknapping, the sign of an expert is how big of a flake you can take off with one strike. I am not yet good at this, and so I was making crumbs more than I was making flakes.

Because I was just crumbling the edges of my blade, I couldn't thin out the piece enough to fit into the handle. It was just too fat and I didn't have the skill to make it slim.
I tried again with the other, smaller blade, but the problem persisted. Here is where we collapse against the foothills of the mountains of practice, practice, practice. Even if my project was all about flintknapping, I wouldn't be anywhere near the skill of Ötzi and his contemporaries after just a few months. Most of the other experiments of this project I have been able to fumble through, or complete in a simplified way, but this one is beyond what I'm capable of.
Watching videos of expert flintknappers, such as the Aboriginal peoples of Australia, I am blown away. Some people can bang out a perfect knife blade in a few minutes. What an amazing and useful craft! To make any available stone into a cutting edge really does set those people in a league of their own.
It's good to be humbled.
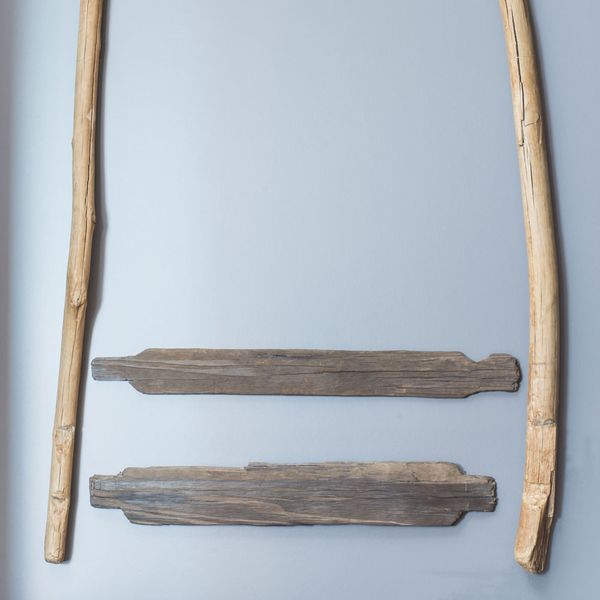
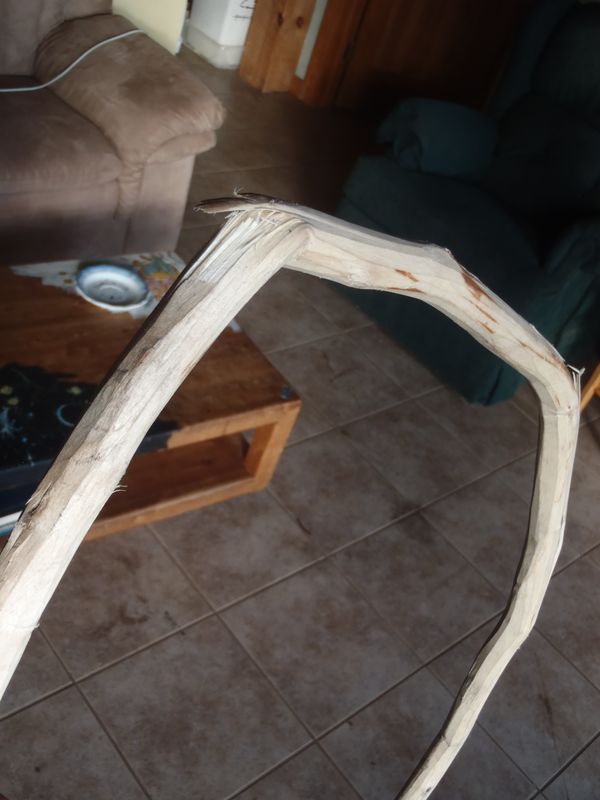
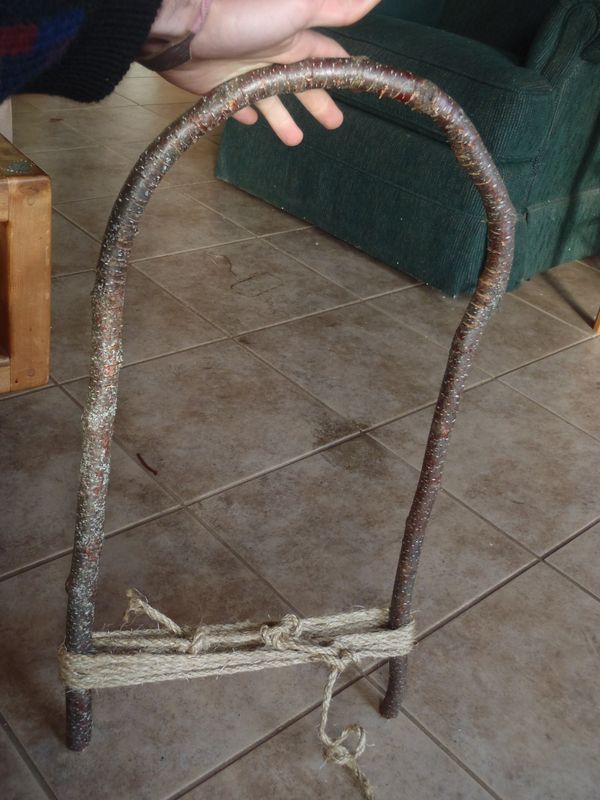
Ötzi's backpack was a very simple shape that is still used today. A U-shaped piece of hazel rod was knotted to two planks of wood, which sat on the lower back for support. If you take apart your modern hiking backpack you will see a strikingly similar construction - just one of those things, like sharks and alligators, that hasn't changed for ages because it's already perfect.
The backpack was a lot of fun to make. My first attempt was begun by cutting a thin young birch tree and soaking it in the cold lake for a few days. While it was soaking, Jarrod Dahl gave me a hint that heat is the key to bending wood, not moisture. So, while sitting around the firepit one night, I pulled it out, stuck it in the flames, and with a little help from my friends I bent that sucker into a U.
It broke, and quickly.
Feeling confused and uncertain I took a hike along the Superior Hiking Trail and stopped along the way to make a small fire and have a solitary picnic.
I thought, why not try again? So I cut a small branch and stuck it in the fire, in the creek, in the fire, in the creek. I figure if jumping in and out of a sauna and a cold lake mellowed out my limbs, it would do the same for a branch.
That one broke too. So I started home.
Along the way I decided, hell, I'm out here with all these trees, and I don't want to give up yet. So I took another tree and sawed in some kerfs. Ötzi's was not perforated like this, and as far as I know nobody recommends the method. But it's just one of those thoughts you have while walking in the woods thinking about your Neolithic friend.

Guess what? It worked. There is still a lot of tension in the piece, but I think as it dries it might stick in that position. If not, applying some heat and moisture like my previous attempts would solidify the curvature.
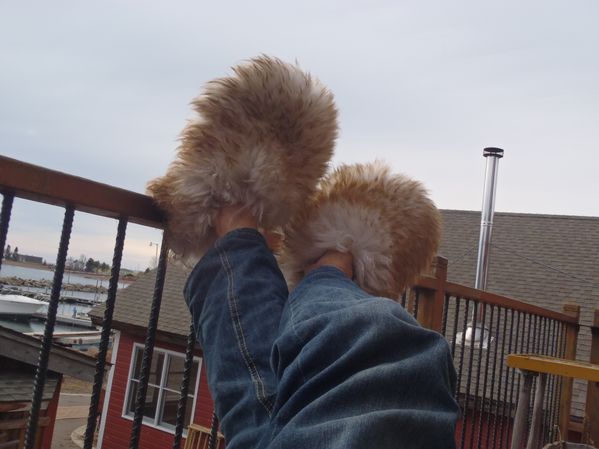
The shoes are back for a sequel! Even though the fluffy wooly slippers were completely comfortable and, in a way, honest to Ötzi's designs, I felt that I could give the ropework another try.
Ötzi's shoes had a complex rope sock tied to the sole, and fluffy hide on the outside of the sock. From wearing the slippers in the snow and mud I noticed that although the leather sole had good traction, the slipper itself slid around my foot and made treacherous walking very hard.
This image is from a very convincing paper on Ötzi's shoe technology that argues for a couple small but convincing changes to the agreed-upon design of Ötzi's shoes. Specifically, this design has the leather soles turned upwards, whereas the attempted recreation has a flat (and much too big and wobbly) sole.
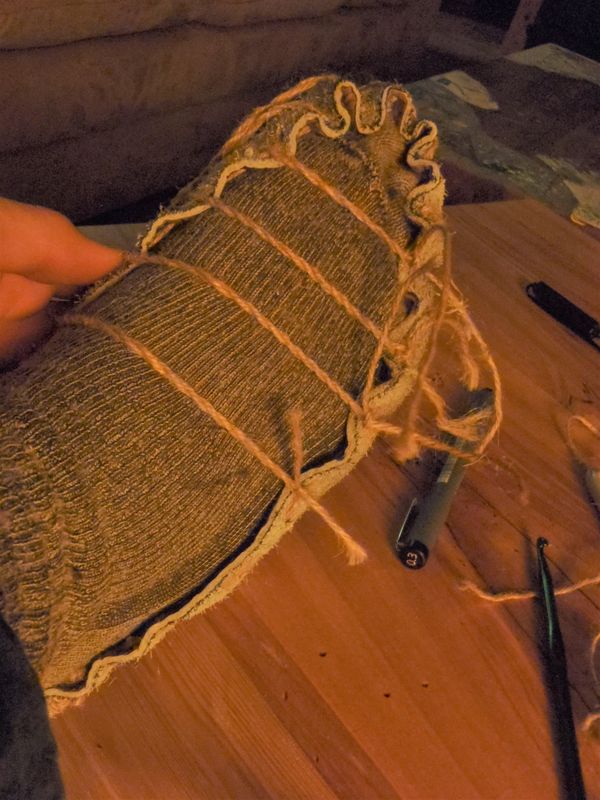
Following the illustration, I punched some holes and straight-stitched around the perimeter.
I pulled the stitch tight and all of a sudden I had a slipper! An area for further research: if this sole was just a bit bigger, this would be a finished shoe. Even without anything else this sole stuck on my foot and I was able to wander around without it falling off. An excellent start!
For a first try, I tied a string around my ankle and started to attach the sole to that loop.
This worked for a little bit, until the strings started pulling the loop down, loosening the tension. Also, it was a huge mess.
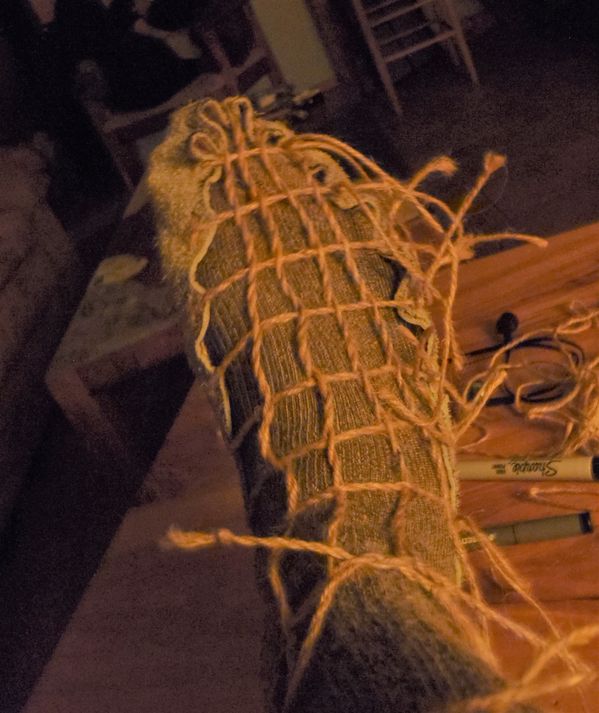
Even so, I decided to keep going. I twined two strands together, fitting the tensioned strands in between the two plies of the twining strands. Using this technique I could start to shape the shoe to my foot.
I really like this method. Makes me want to weave up a hammock. I'm not sure if it's exactly what Ötzi did, but it certainly looks that way in the reconstructions and in the archeological photos.
I started to notice that if one cord passed through the middle of the other cord, one could slide around the other. If, instead, I only passed one half of the cord through the middle of the other, both were locked in place. Just using these two twining knots I was able to make some interesting patterns.
After a while, the loose tension from the beginning made it really impossible to get it tight around my foot. So I started over.
I tried to twine the first strands over again, and then twine the tops into a thick foot-hole. I thought this might be the way because in the original photos the tops of Ötzi's shoes seem much thicker than the cordage around the foot.
Unfortunately, this was also a mess. So I started over again.
At this point I broke from the rigidity of archeological recreation and veered, as I so often have during this project, into the world of comfort and supreme aesthetic judgement. Also, I was getting frustrated trying to evenly create tension betweeen a zillion small rope fragments, and I wanted to try a pattern that would hold some tension across the width of the sole.
I started this attempt by crossing these strands over my toes. It fit really well almost immediately. Not entirely accurate, but stylish and snug; if a single mission statement has emerged from all this experimentation, that's it.
Continuing with the twining knots I had learned earlier, I kept going and ended up with a supremely well-fitting sandal-sock-moccasin.

Looks great, right? I could hardly believe it myself. The top is mostly a bunch of loose knots, and I know it could be made much neater. But the shape works, and I call that a successful experiment.
Ötzi's shoes are a combination of the two examples I have here. The warm fluffy bear-hide uppers were sewn over the ropework, in order to provide both warmth and structure. I'm really very pleased with myself here. I'm now considering becoming a full-time rope-and-tanned-hide cobbler.
Today I am reading Robert MacFarlane's Underland, and his words on deep time have struck truth in me as I finish this long and strange project. In this passage he is climbing through a mountain pass in search of prehistoric cave paintings, his own winter journey towards ancestral craft.
Something I heard an archeologist say in Olso about deep time returns to me: "Time isn't deep, it is always already all around us. The past ghosts us, lies all about us less as layers, more as drift." Here that seems right, I think. We ghost the past, we are its eerie.
The crags are seamed with blue ice-falls. My eye is caught by a thread of green, drawing my sight on. It is a thin path, leading between the stones, running a fine line through the moor grass, joining former doorway to former doorway and then on around the bay, picked out by the bright mosses that grow on it. It is a path made perhaps a century ago, still there as a trace in the land, now kept open by otters and others.
I add my own feet to the path, thank it for its softness underfoot, for its elegenace of route - and for its movement within time.
I am so, so thankful for Ötzi's story, for his lessons, for what he has gifted us with his perfect death. We may never understand why he was killed, but I hope he knows how much he is appreciated by me and by others. I hope he is at peace.
Ötzi was pursued up the Hauslabjoch and killed by an arrow while he was facing the other way. The snows fell, the glacier grew, and he slept for 5,300 years.
He and I have gotten along famously.
Leave a note, catch me where you can, and stop by for a cup of coffee whenever you're in the neighborhood.